It seems that it is one of the persistent themes of my life that I build a studio and then I move. It happened in Savannah, and it happened when I built my last studio in Texas at our home on Hunters Moss. And, yes, it happened with the Liberty Oak Studio as well.
The pandemic created opportunity but it also wreaked havoc. It gave me the opportunity to build the studio as my world of work was transitioning to remote, and then it wreaked havoc when the school I was working for was unable to sustain itself without in-person learning.
I was one of many who were furloughed, and one of many who had to find other jobs. Fortunately for me, finding work has never been a serious challenge and very quickly I found an opportunity in Atlanta, but this meant leaving behind my studio and turning it into a storage unit while we packed up our things, rented out our home, and found a new home in Woodstock, Georgia, but that’s a tale for a different post.
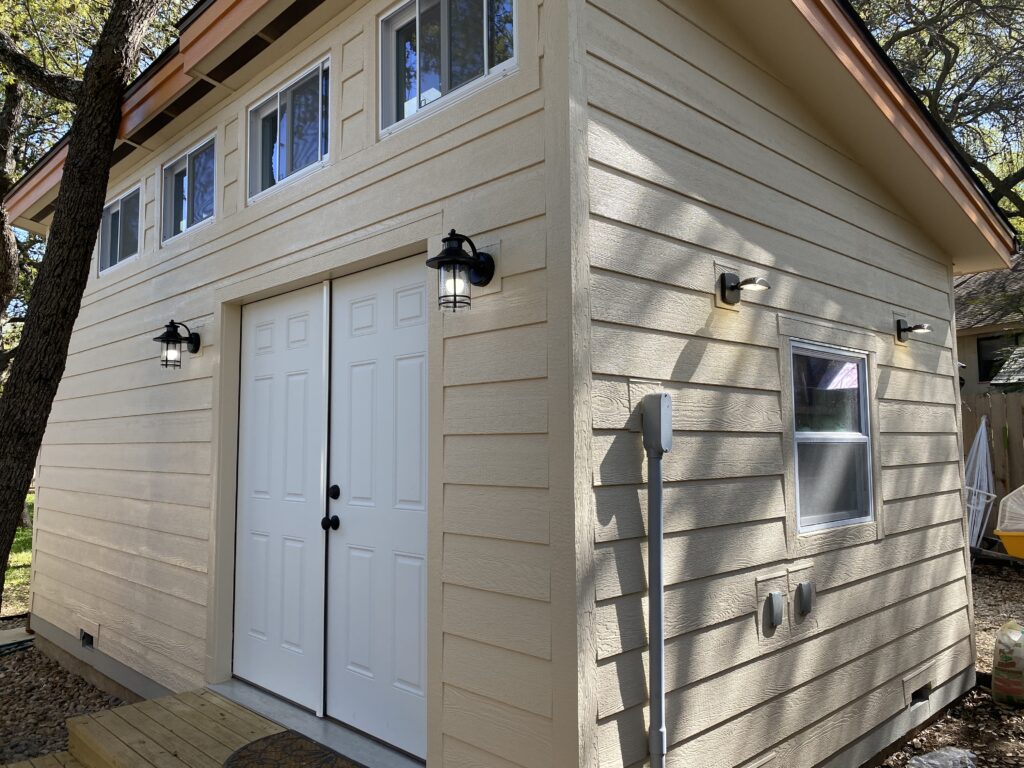
This story has a happy ending though. After some trials and tribulations, we are now back in San Antonio, and just months away from returning to our home and my studio! and so until then, here are a couple of photos of the finished result. They make me happy and keep me motivated to return!
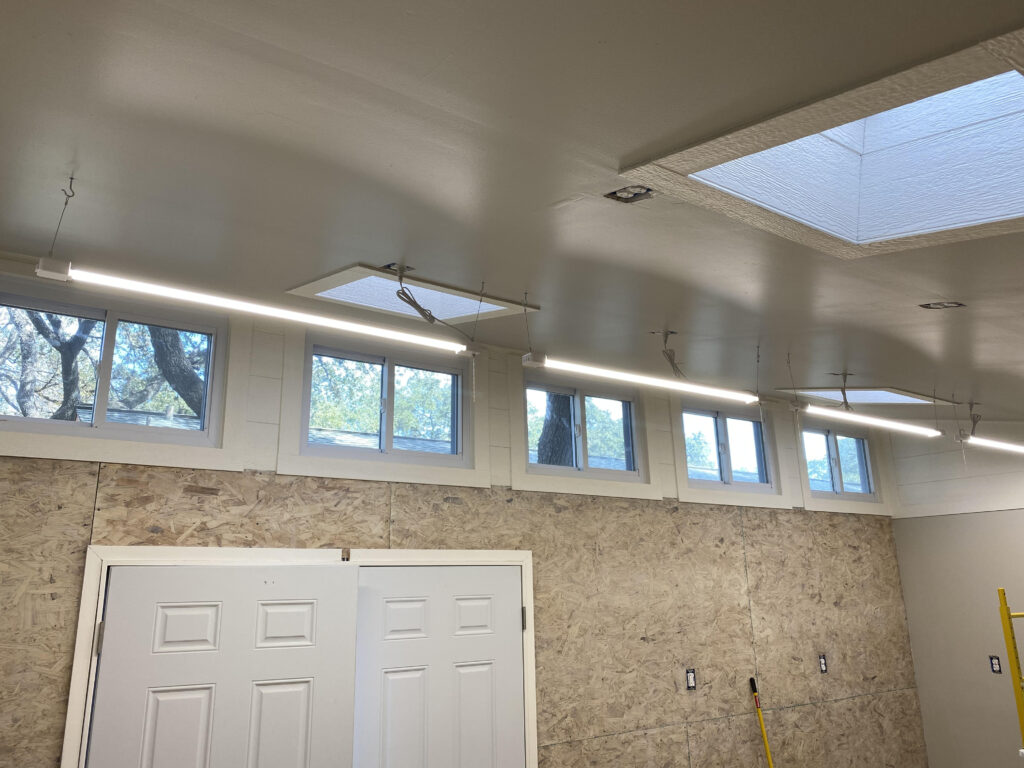
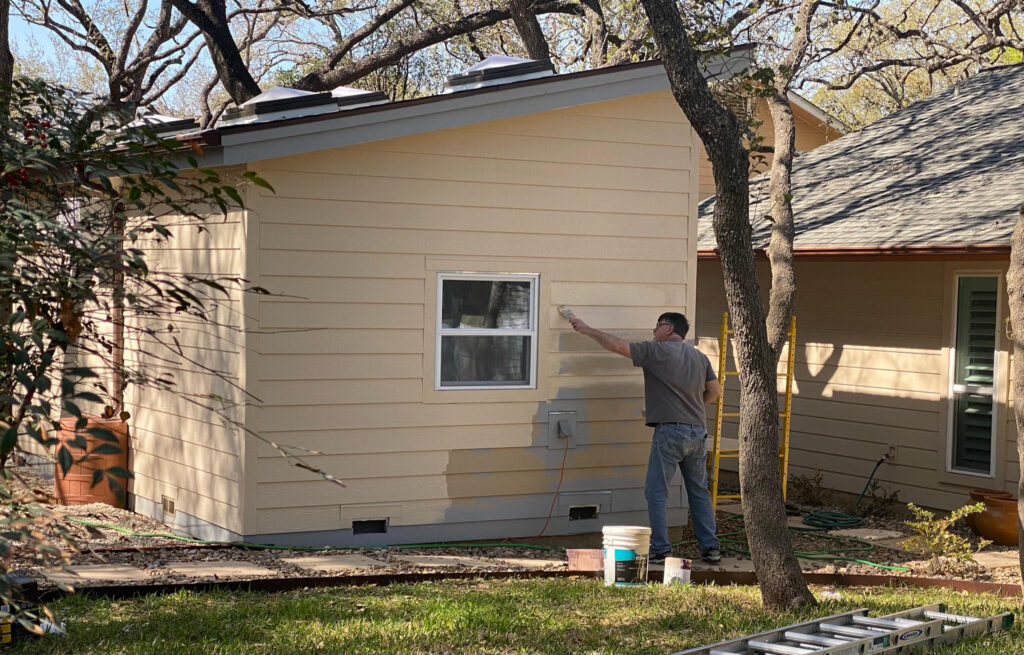
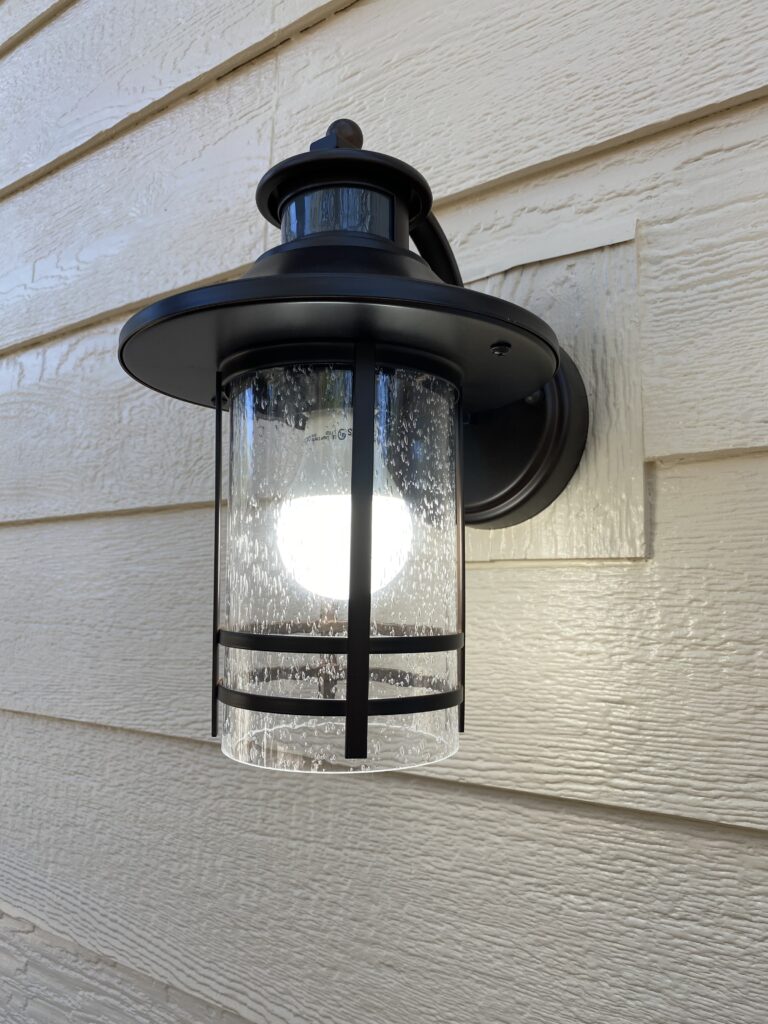
Finishing up the interior lightingInstalling the air filtration Painting to match the houseExterior lights for the porchExterior lights for the welding areaExterior painting done!
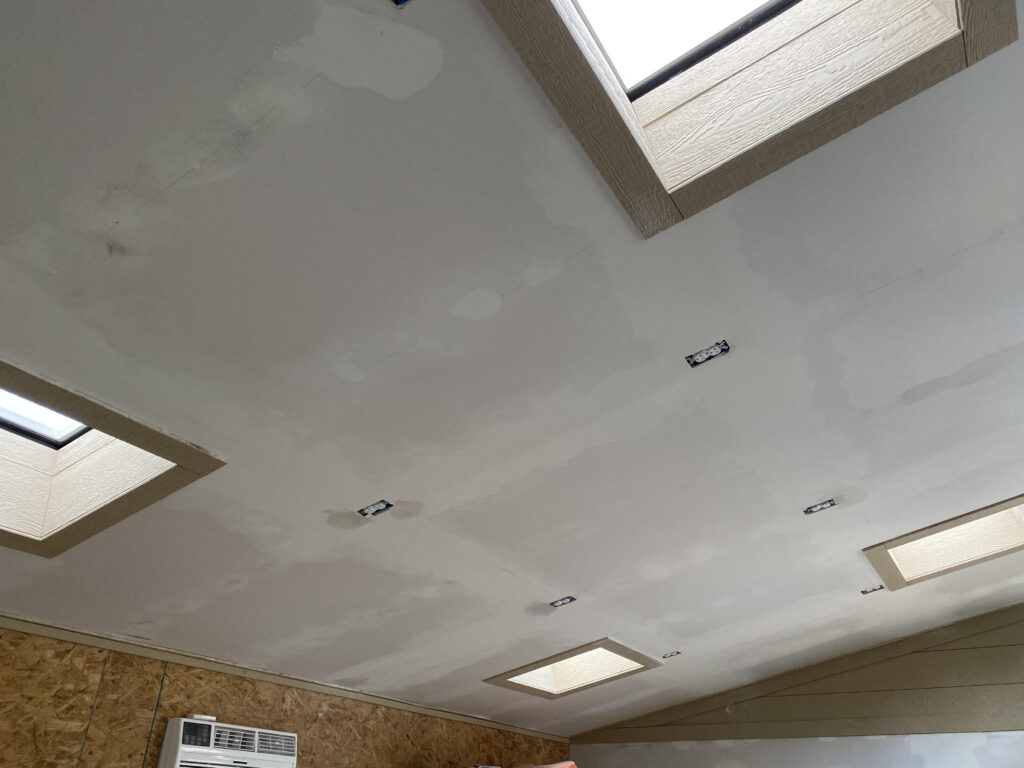
I love working with Joan Marie – she is a great collaborator! We started discussing the amount of light in the studio with two wall windows and a set of clerestory windows, and of course we wanted more! So, the subject of skylights came up. And, if we were going to do it, the timing was perfect!
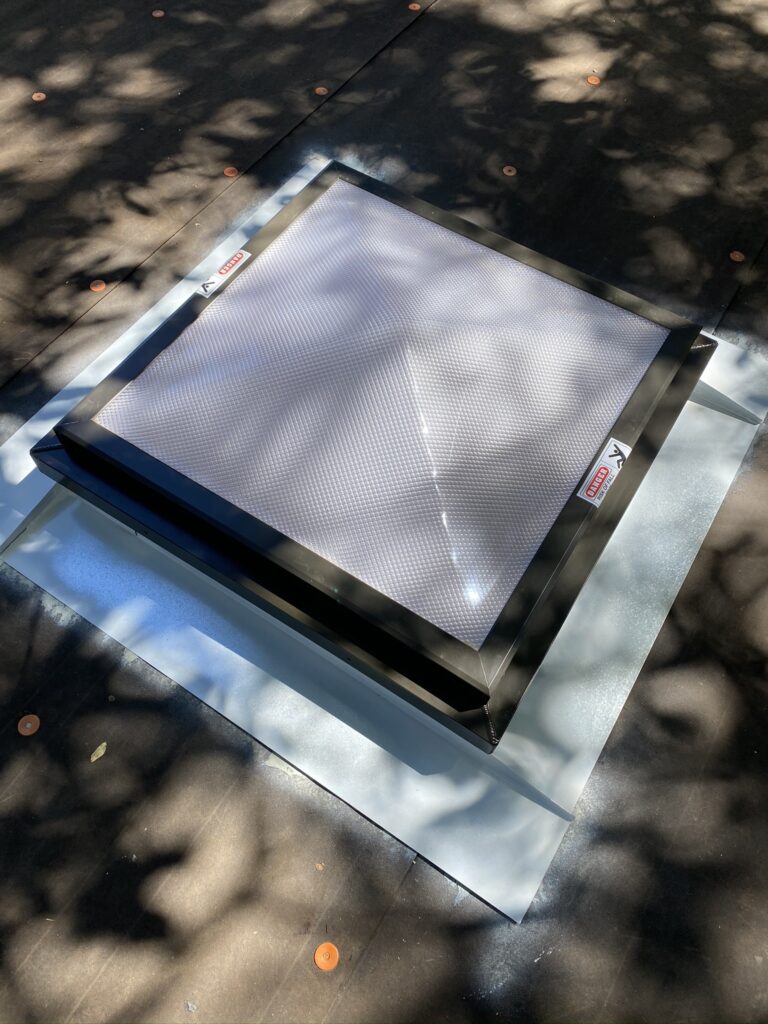
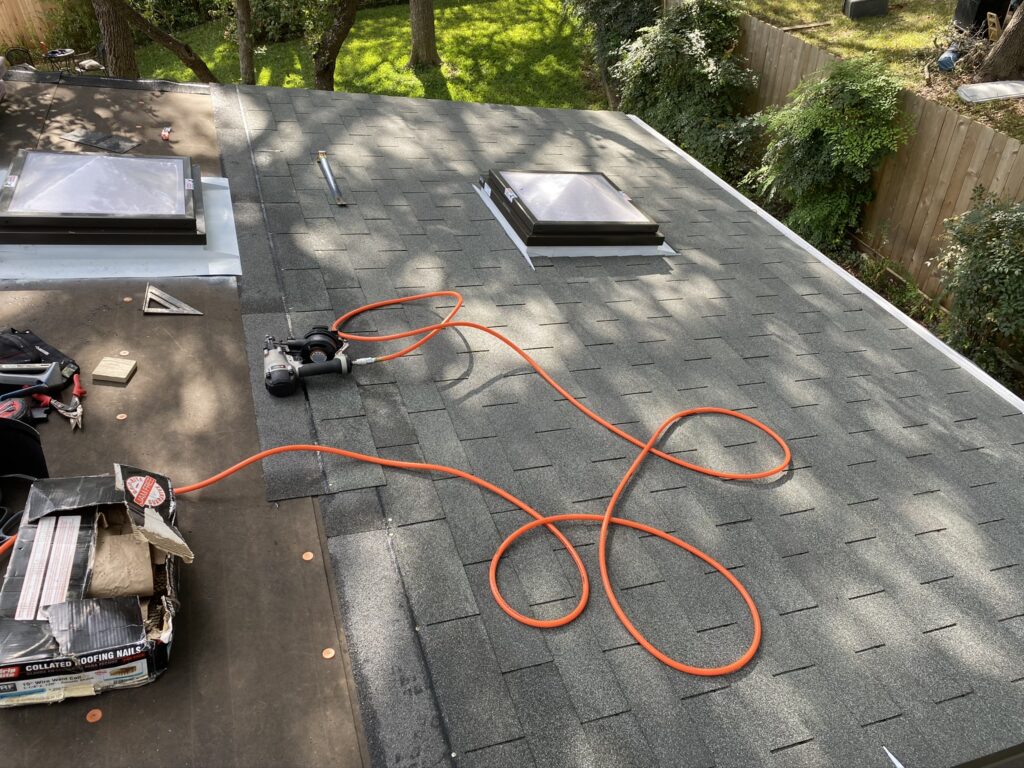
Putting in skylights really should be done before the roof is put on, so I quickly began to research the kind of lights we’d use and where they’d go. In the end, we decided on four 2′ x 2′ lights made by Sunoptics. They are triple glazed fixed curb-mounted prismatic pyramid skylights, and you can see how easy they are to install.
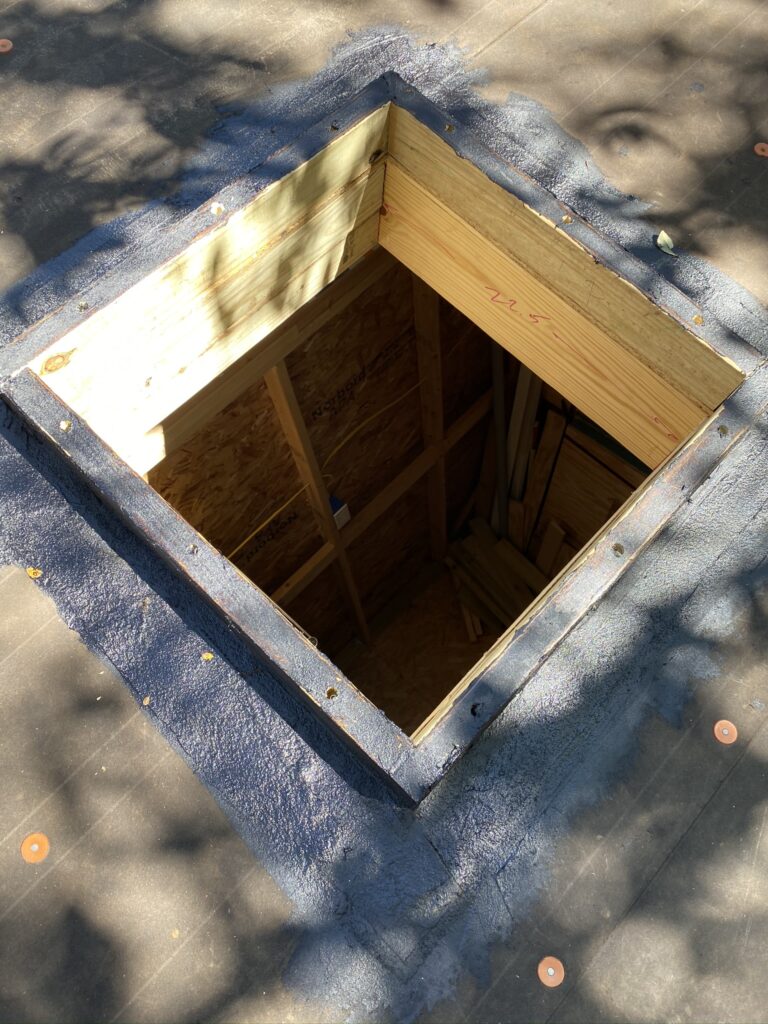
First cut the four rough openings in the roof (gulp!), and then build up the curbs with treated 2″x4″ lumber. Next build up the roofing underlayment with fibered black asphalt roof coating (I like Rust-oleum products, but my goodness, use a organic vapor respirator lest you are prepared to suffer from a day-long headache). I also use a nylon mesh to reinforce the asphalt and pay close attention to the lapping and the fall of the roof. Next the metal flashing goes on, properly lapped, and the shingles follow. Once the shingles are in place, a foam insulation strip is added to the top of the skylight curb and the skylights are put into place and screwed down.
Careful not to over tighten the screws or you’ll crack the plastic! Easy, right?
Honestly, cutting the first hole was a little nerve-wracking!This is a seal with fiber mesh to tie into the feltMetal flashing trim over top of the sealSky light is in placeRoofing shingles go down around the flashingVideo of the Finished Roof
Drywall and Trim
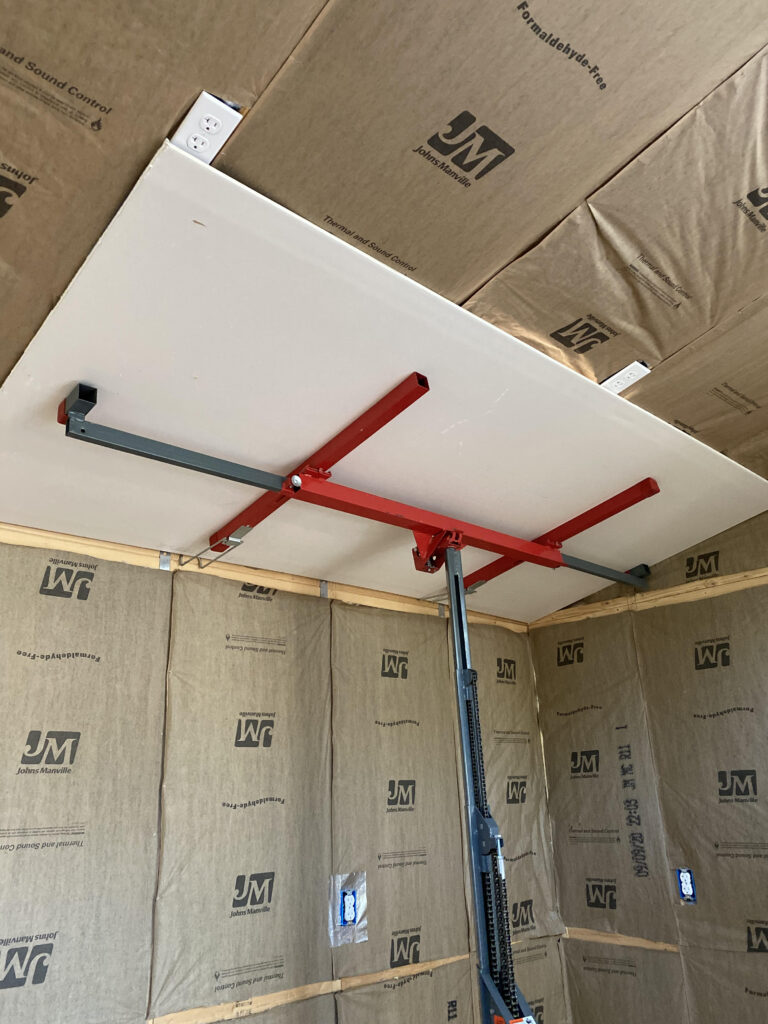
I’ll confess that I hate drywalling almost as much as working on a ladder, but for different reasons . . . drywall is a really dirty process with the dust, and the mud, and all the taping, and the endless sanding, not to mention the sheer physical weight of the boards themselves.
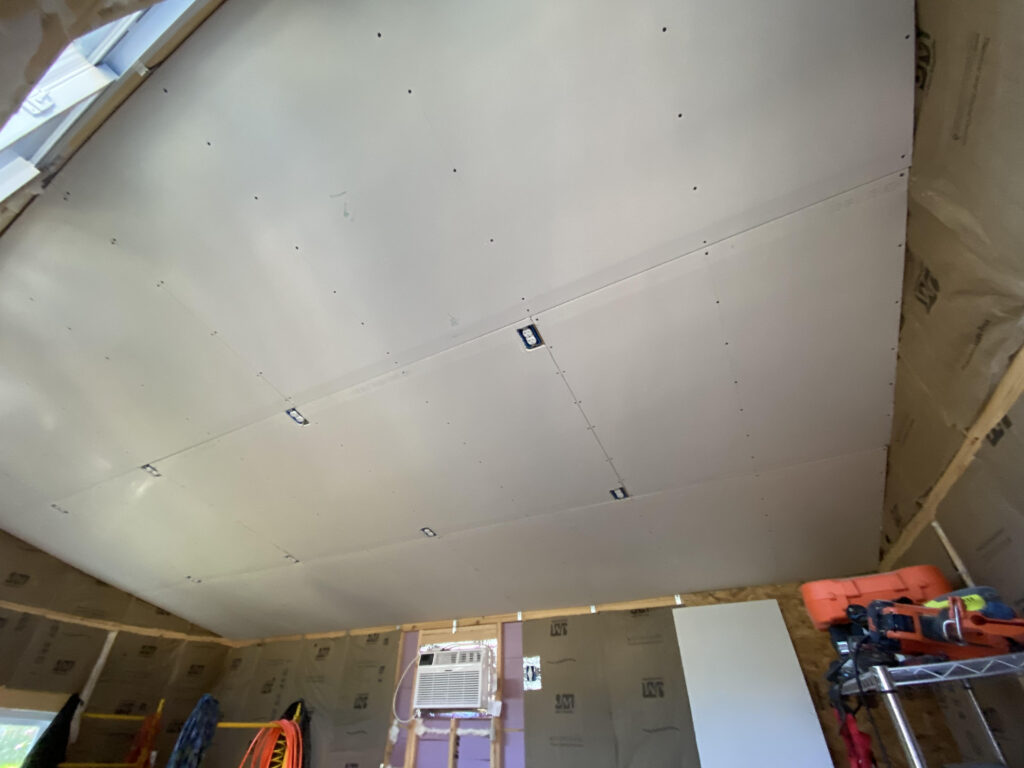
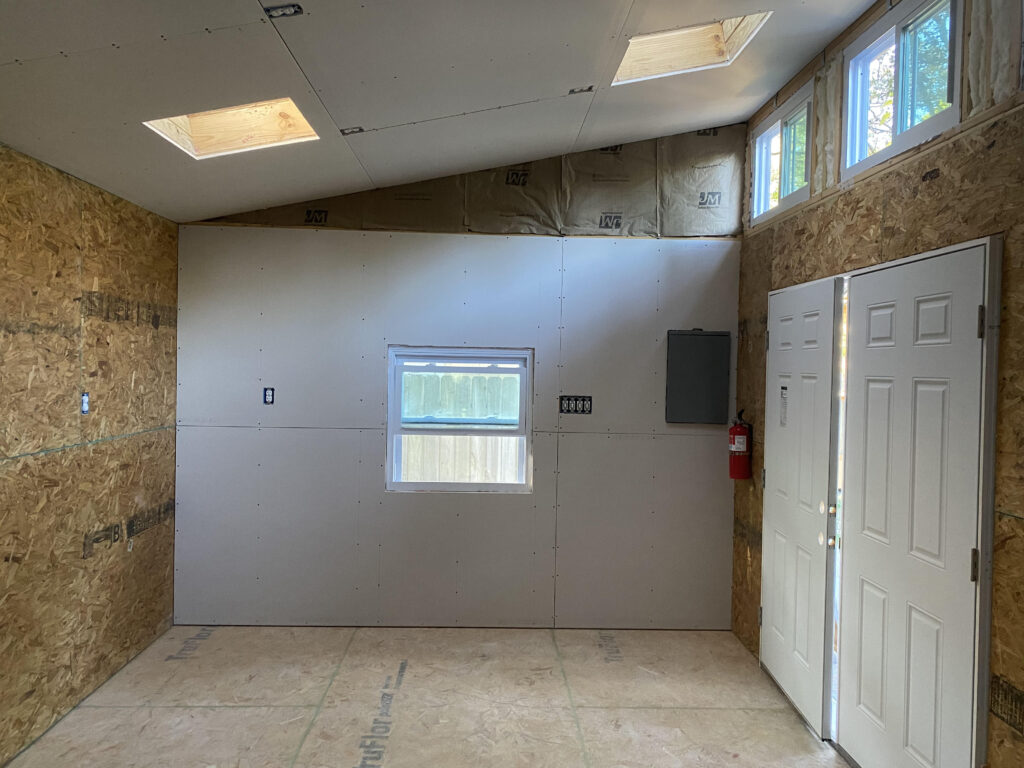
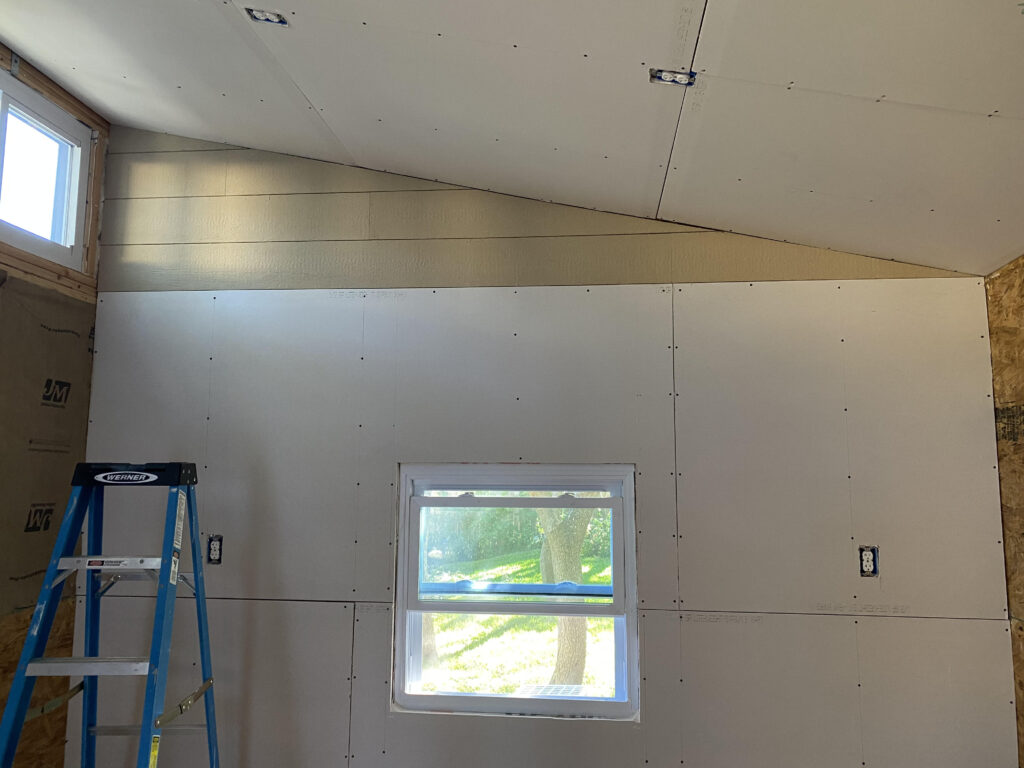
But, with the right tool, a drywall lift, at least one person can do the job and not risk life and limb by trying to hold up a board and screwing it in at the same time! Below are a few shots of the drywall being hung, and as well, I’ve included some of the left-over exterior siding being used in the clerestory section as a kind of shiplap. In fact (waste not, want not), I used all of the remaining exterior LP Smartside lap board as trim material for the skylights, windows, doors, and baseboard. It has a nice texture that contrasts nicely with the smooth drywall.
And, speaking of texture and contrast, we decided that the long walls would be sheathed with regular 7/16″ OSB plywood instead of drywall. Not only is this surface practical for the studio (less reliant on finding studs to hang things on the wall), it tremendously improves the rigidity of the building and, with all the insulation, cuts down the outside noise quite a bit! The studio will be quiet, save for the tunes the artists crank out while working!
Cool tool!Ceiling goes up firstThis lift makes the differenceDone!Short walls go quicklyHere’s where I used the extra sidingThe siding was also cut down for trim work around the sky lights
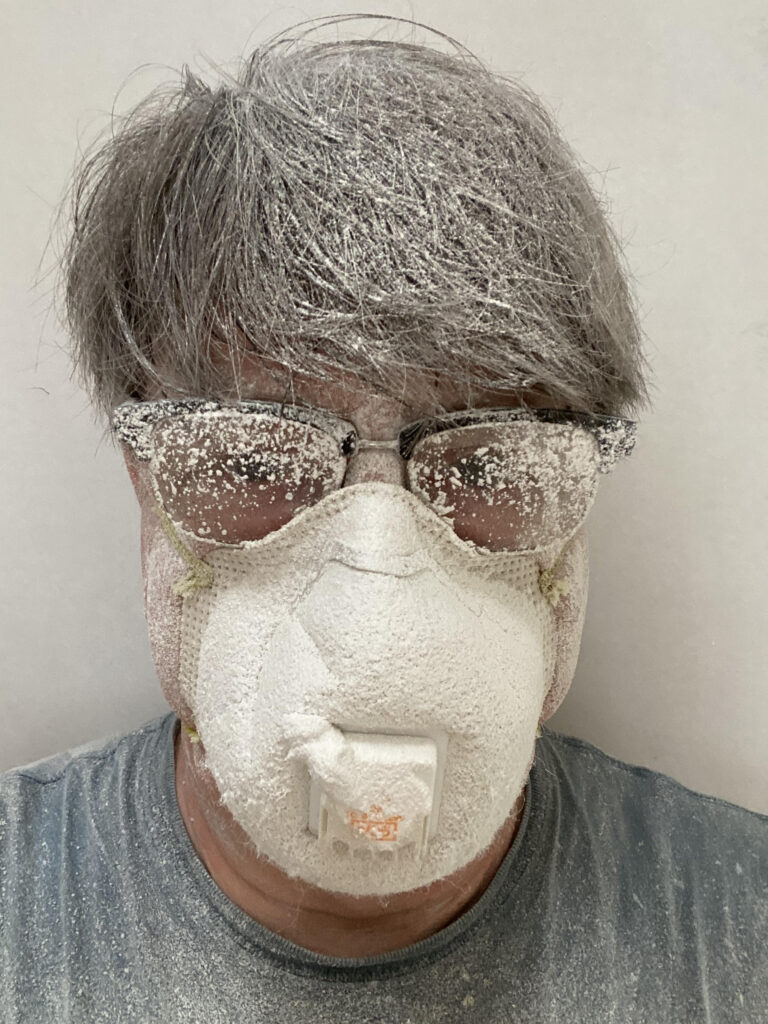
The Artist in His Natural State: Dirty and Sweaty
Floors and Paint
There’s a point in every project when you just start wishing it would be done, and the special temptation with a studio or a shop is that some things are “good enough” and you could theoretically stop working on the building and start using the space for its intended purpose before it’s actually finished. You can always tell yourself that you’ll get back to the details later. Riiight!
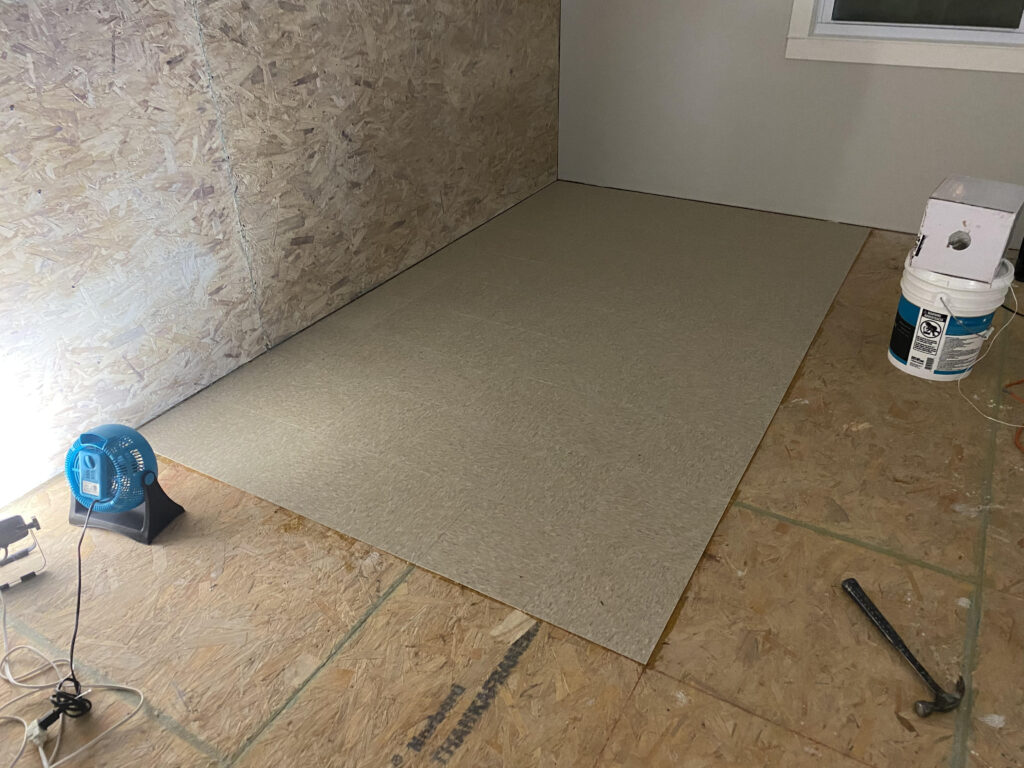
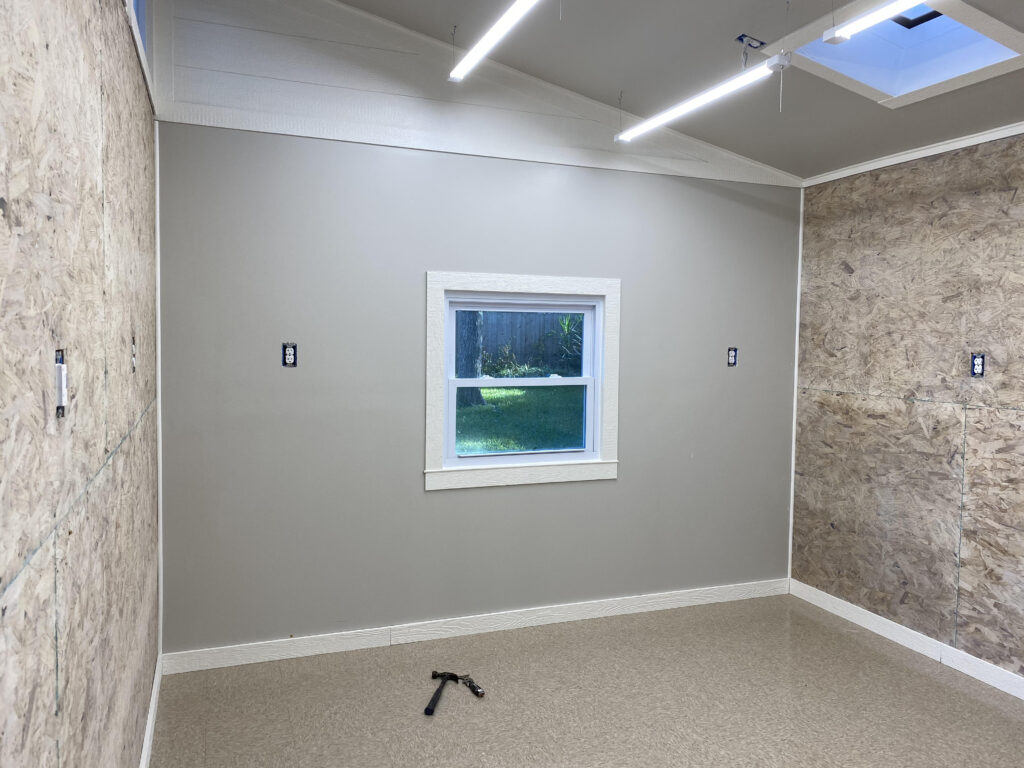
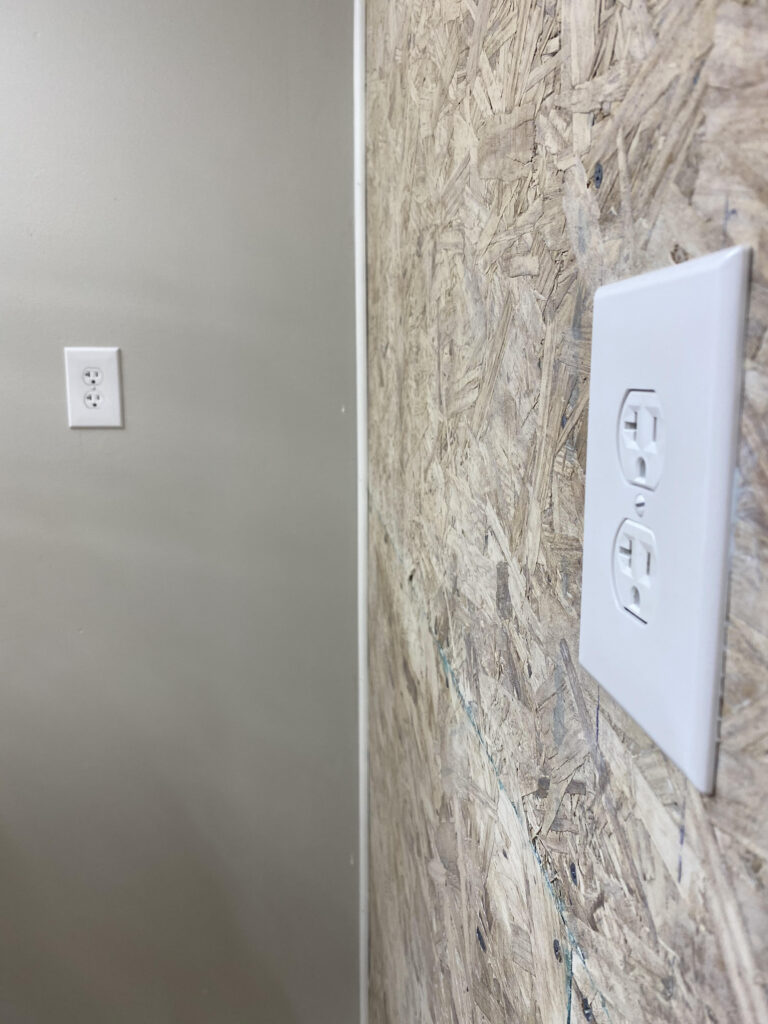
But I know myself well enough to realize that, once I move in, nothing else will ever get done because much of my studio equipment is too cumbersome to remove, and you kinda get comfy and accustomed to an unfinished state. No, for me, it’s got to be complete before I move in, so a CVT floor (with 4 coats of sealant), baseboard floor trim, finished paint (including a sanding/whitewash treatment for the OSB), and even outlet cover plates are all needed now, because if I don’t do them now, they’ll never get done!
The floor was divided and completed in quadrantsNumber twoPaint and trimNice contrast between the finished wall and the OSBAlmost finished! Just need the cover plates!
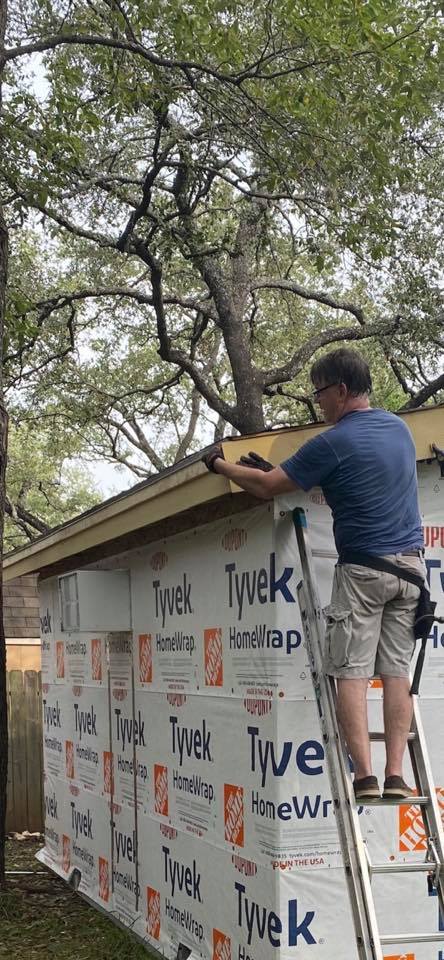
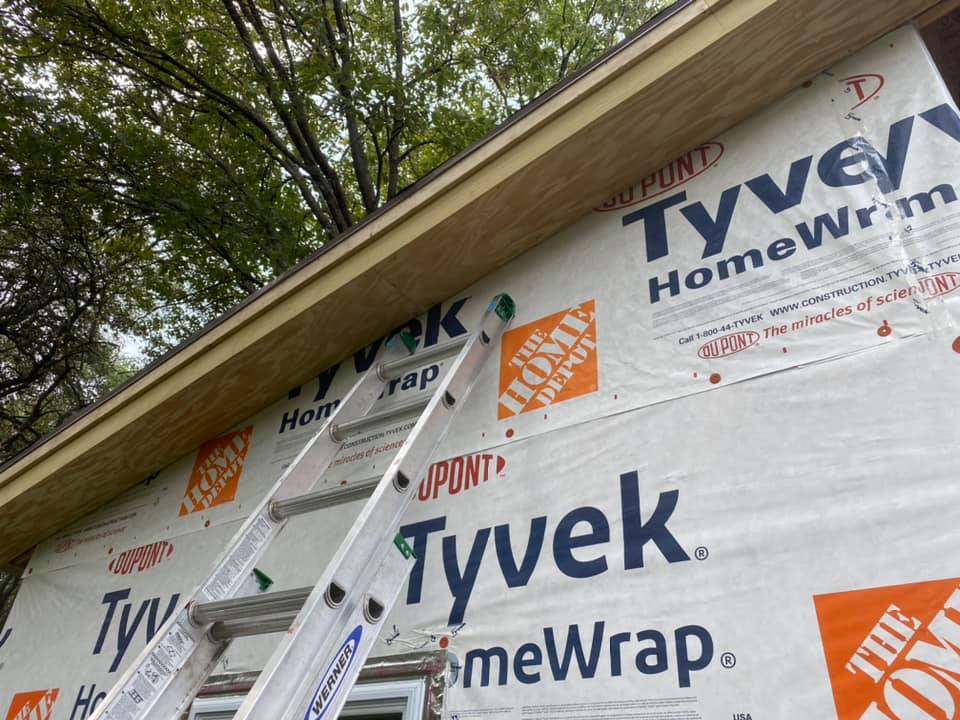
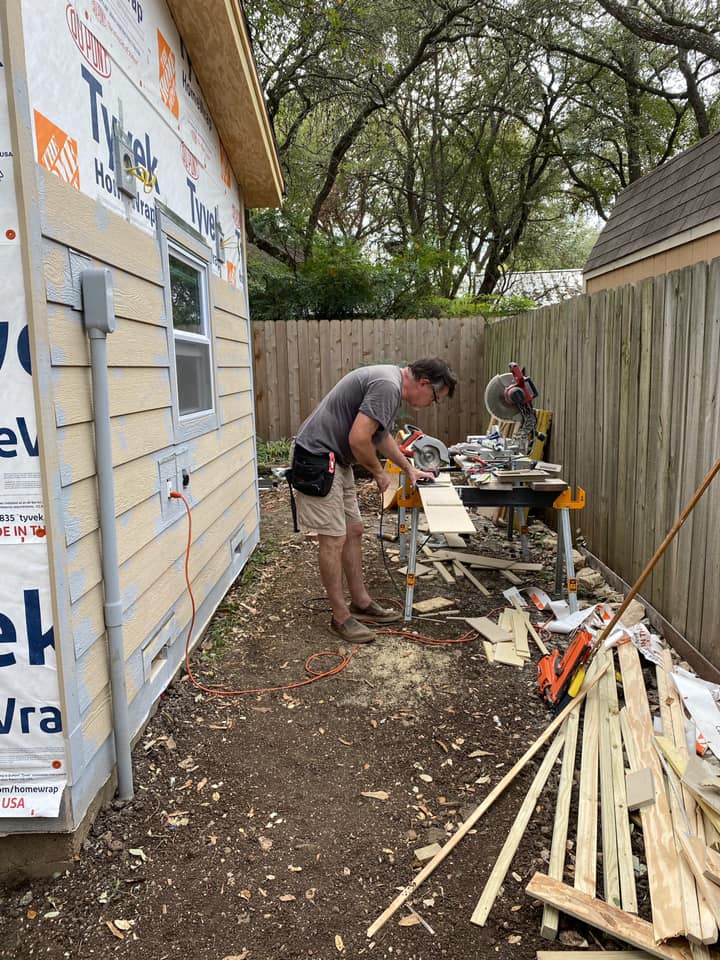
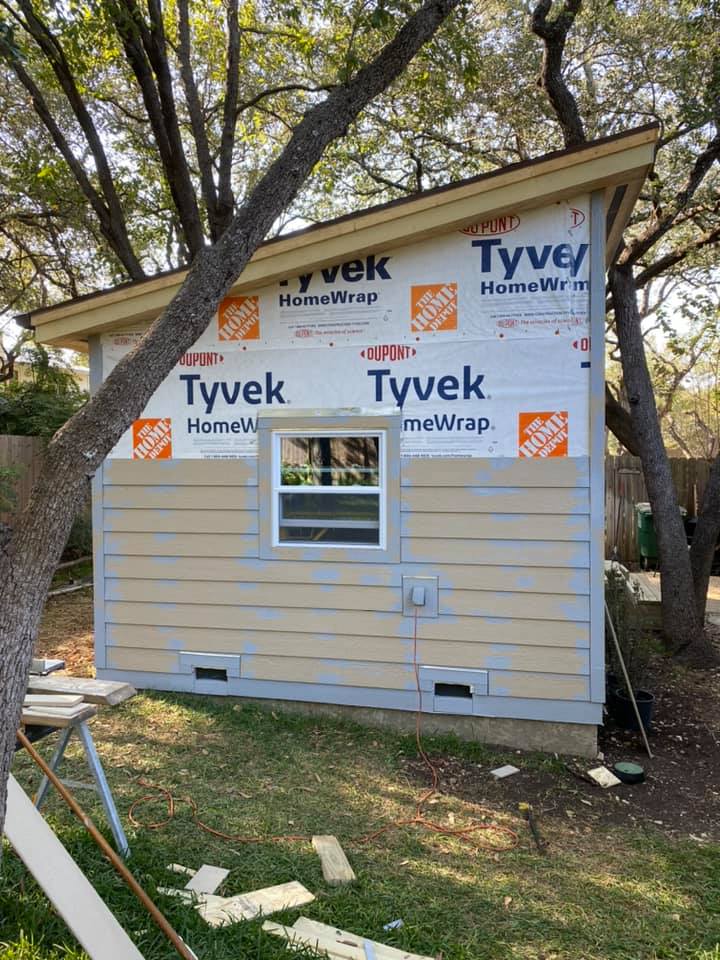
Fascia, soffit and siding take time. Time on a ladder. I hate ladders!
Most of the work done here was completed over a couple of weeks, interrupted by work on the power (see below). You can see Joan Marie got a couple of photos of me at work, putting up the fascia. I used a combination of 8 inch Hardiboard for the facing and 1×4 that snugs up under the drip-edge flashing. The soffit uses sanded quarter-inch plywood, with a screened gap on the front and back of the shed roof for ventilation. FYI, I left enough felt overhanging when it was laid so that by the time I built out all the fascia materials it would all be covered.
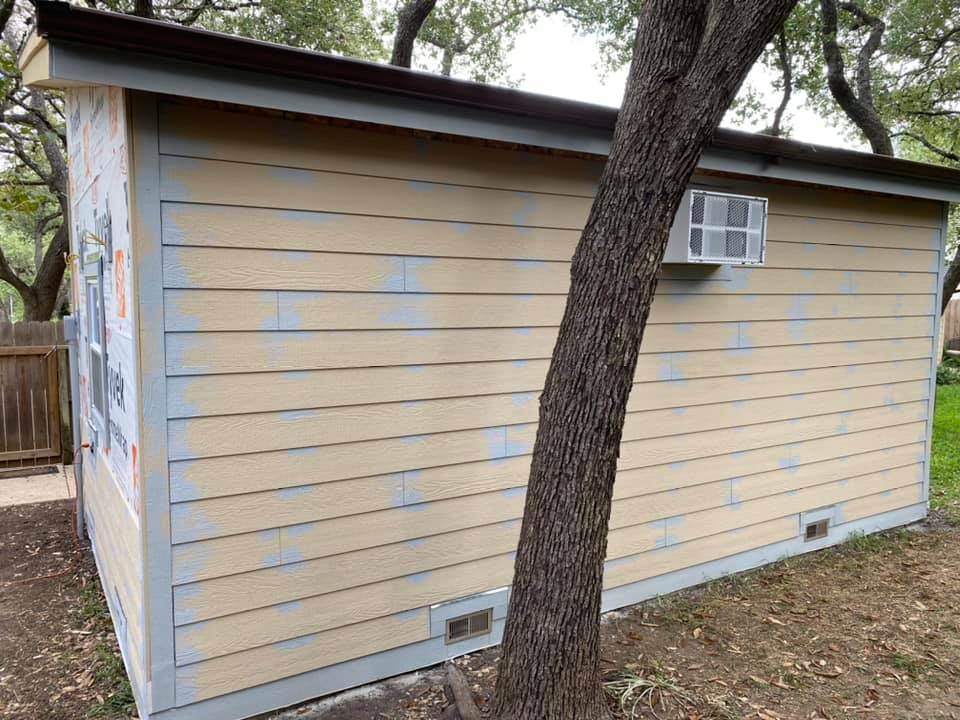
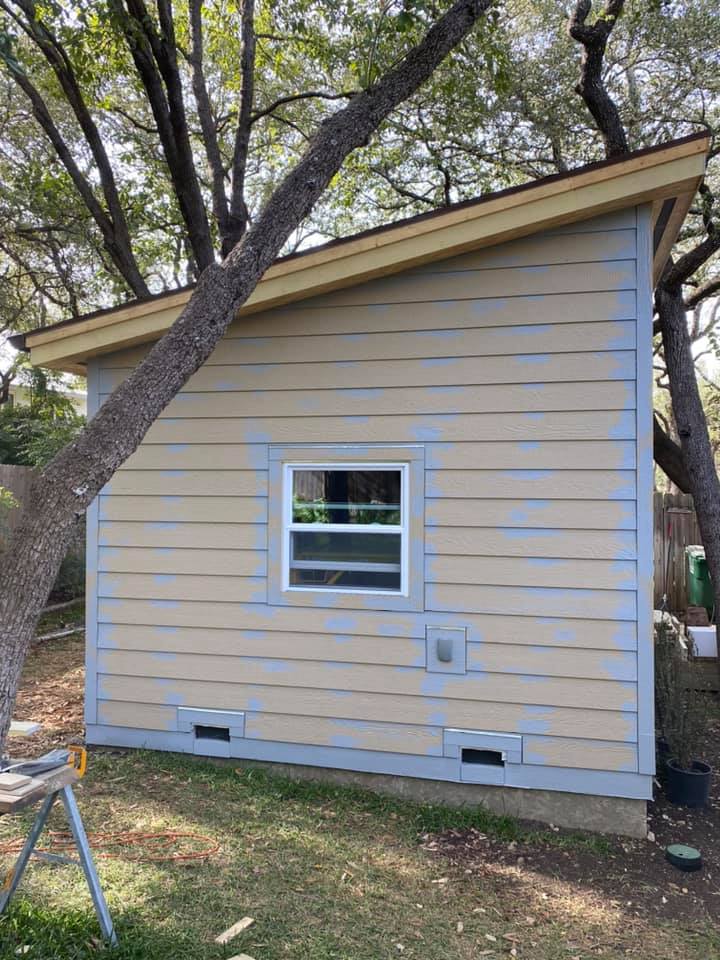
The siding is LP SmartSide – their clapboard product. It’s lightweight and very easy to work with. I’ve never done clapboard siding before, so of course I started on the back side of the studio where any mistakes would be less obvious (the entire build has been this way, using the back side of the structure as my test bed for ideas). As of this writing, I’ve done all sides except for the front. In the one photo that Joan Marie took, I’m wishing I’d left a bit more of a setback from the fence line – things were a little crowded on that side!
The front has to wait until I do some custom work on the newly installed door. My goal is to take the door I purchased (a steel, right-hand in-swing, double door) and make it work better with the siding I’ve chosen. More on that later, but I’m pleased with the siding work so far!
Fascia and soffit work with HardiboardA stepped look also helps with the dripedge to be installed laterThis was an adjustment to not damage the treeScreen to keep the crittters out!Start at the bottom and overlap each boardNice easy run with only a small opening for the ACThis one was a little more complicated!At work with the chop sawLast side!It goes quickly with practiceDone!
Electrical
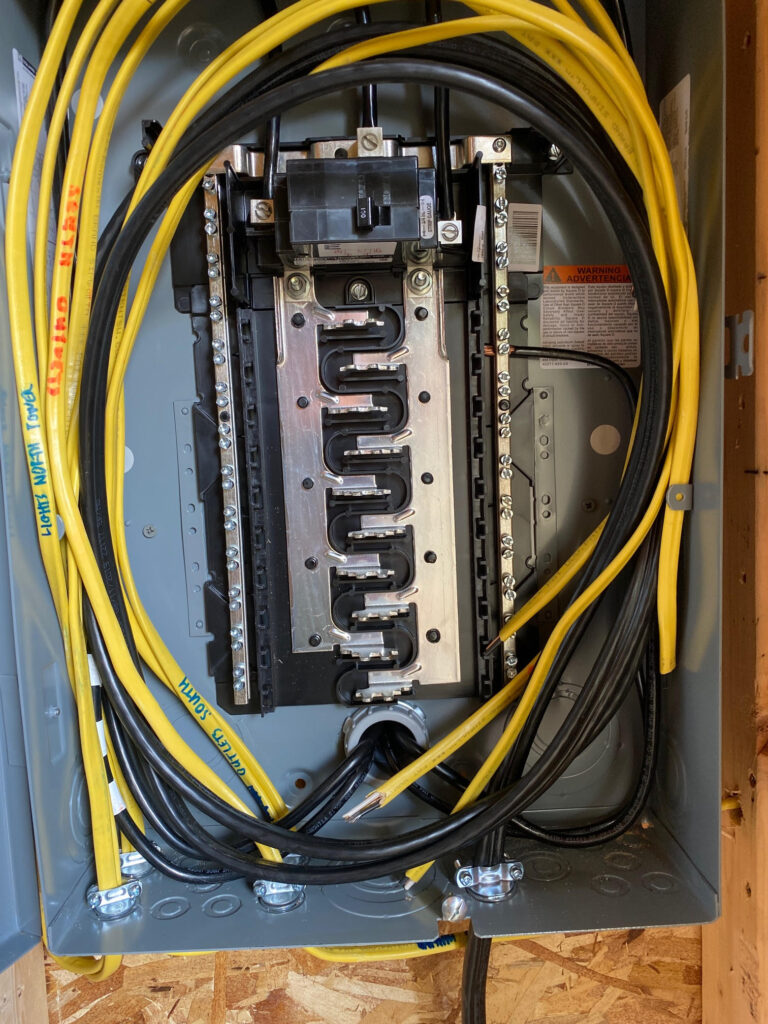
Electrical work has always scared me, having been shocked a couple of times. I was once knocked flat on my ass by a 220 line that was improperly grounded. However, this time, taking no chances, I had expert help from Steve Strapple and Victor Pagona. Steve helped with layout and design, and Victor helped inspect my work and connect the main panel to the sub-panel. Pulling 4 cables (three 3 gauge (THHN) cables, and one 6 gauge ground) through buried schedule 40 PVC is no fun, but we got it done!
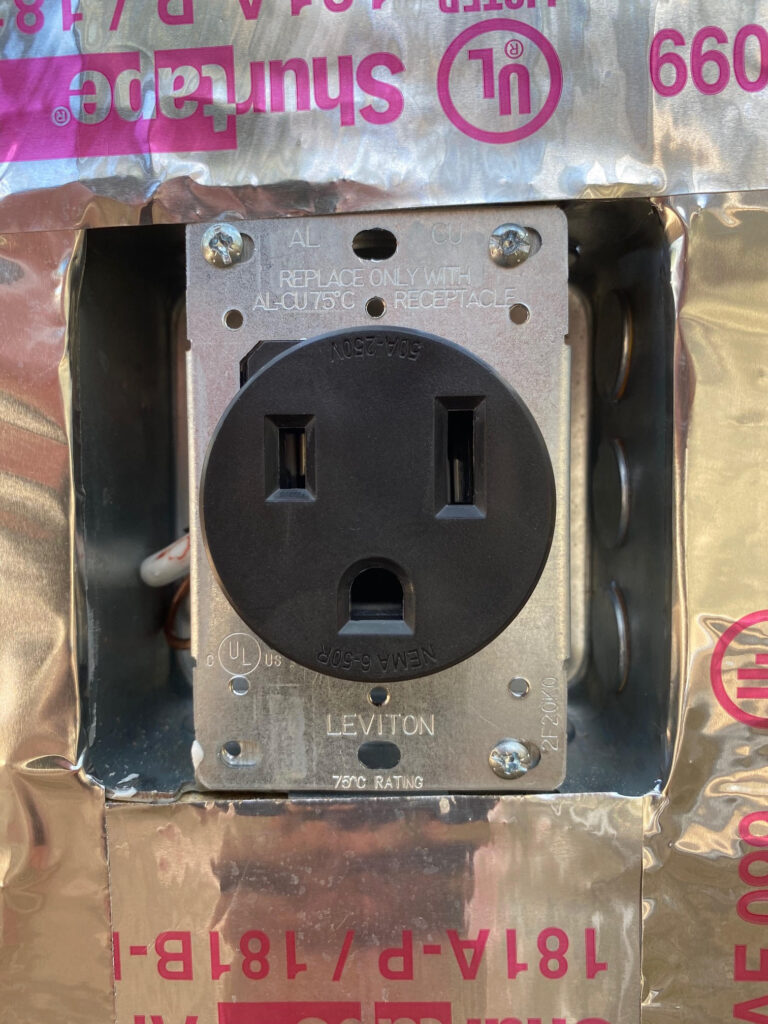
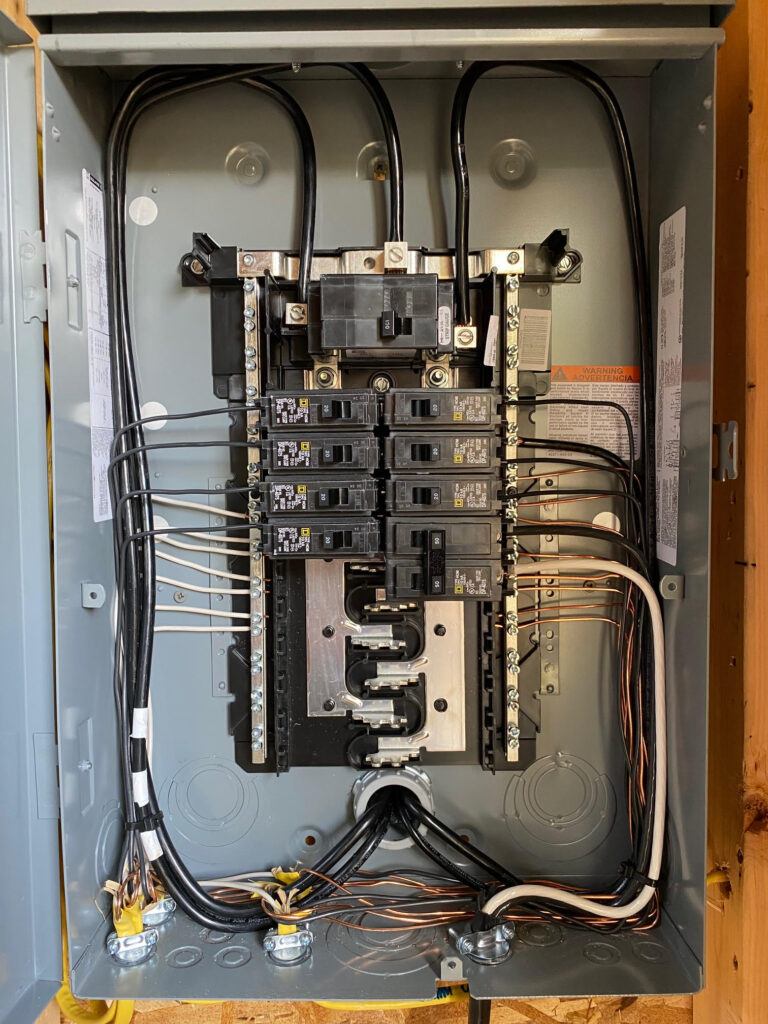
The sub-panel pulls 100 amps, divided between the welder’s requirement for a 50 amp line and a 220 circuit, and the remaining 50 amps divided between all the 12 guage 110 lines – two circuits for lights, two circuits for 20 amp plugs, two circuits for outside lighting (one decorative at the front door, and the other task lighting for the welding area), and one dedicated circuit for the air conditioner.
In all, I was pleased with the work I was able to do and the guidance I got, and as Victor noted, the whole system is overbuilt. Call it a genetic flaw that I inherited from my father, but I overbuild everything!
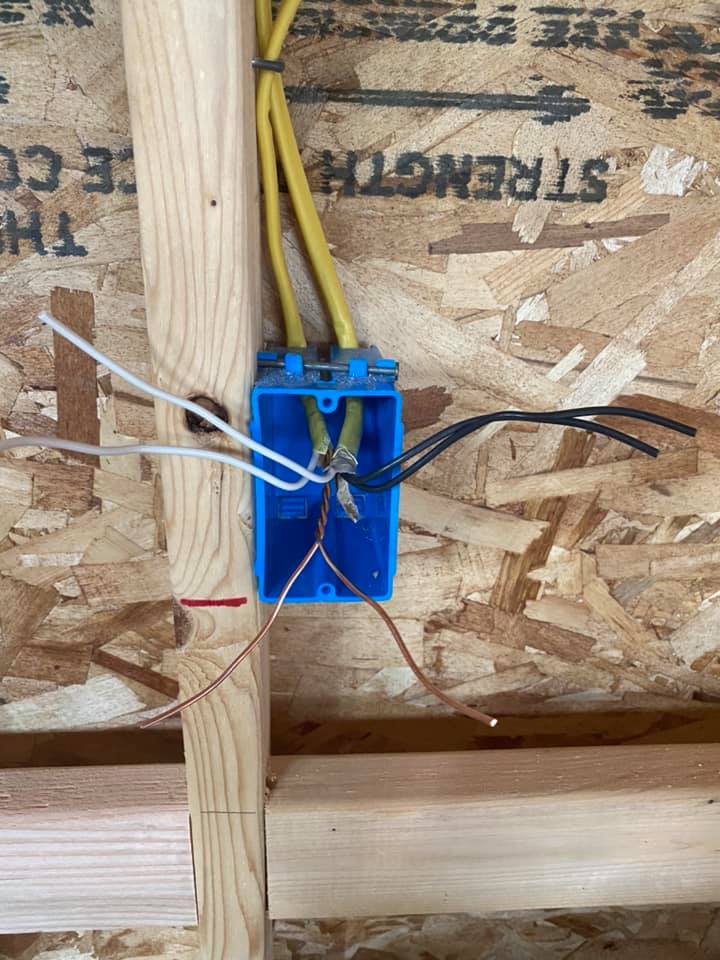
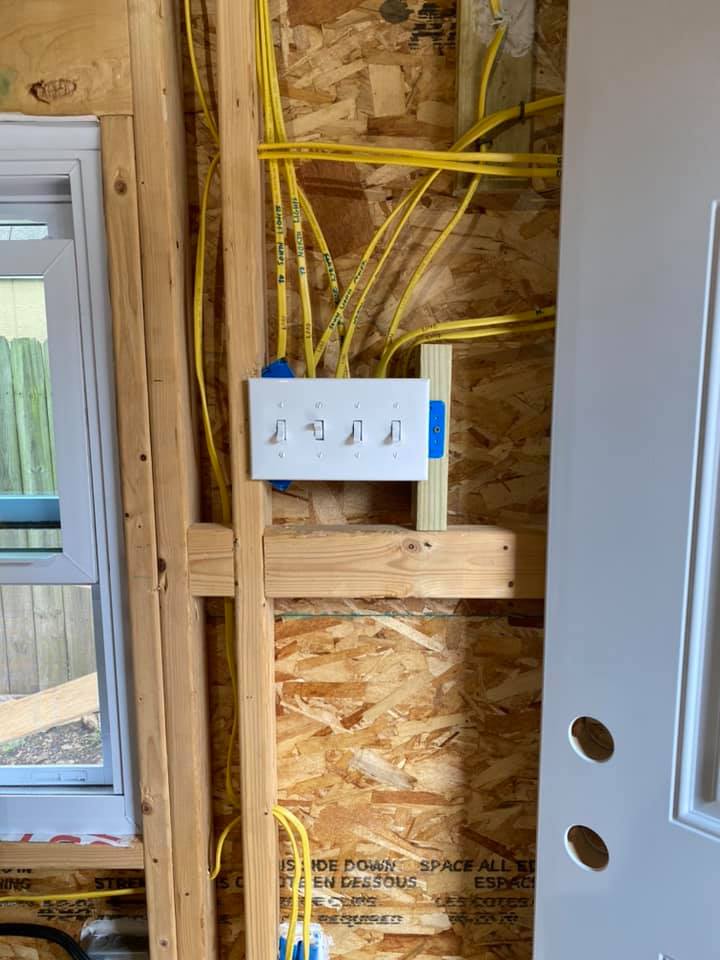
Rough wire before outlet installNew outlet installed220 on the exterior for weldingPanel beforePanel afterwardCoverplates installed
Steps and doors
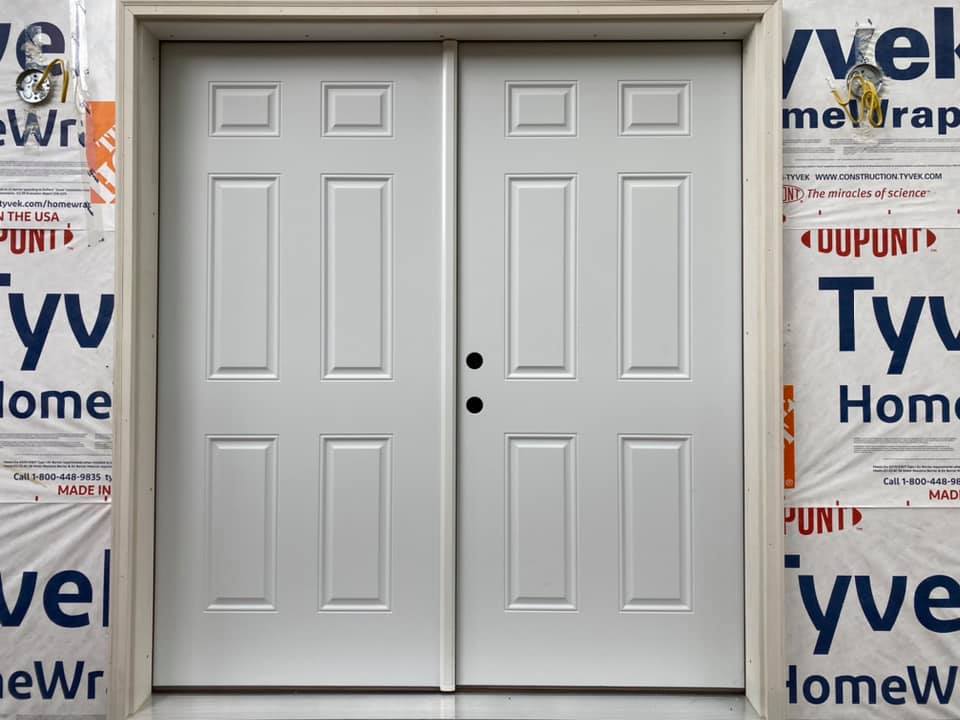
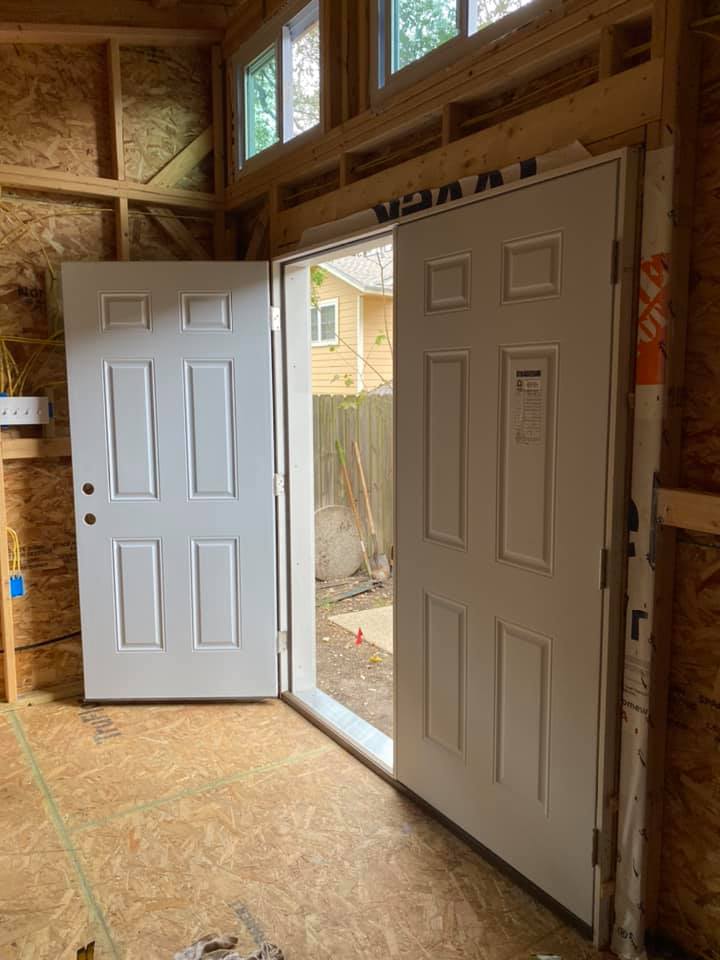
I had to go back and add these images. I’d forgotten to include them with the siding images. FYI – the door went up very easily – level, plumb and square. I like it very much. It’s a double door with a right-hand in-swing that opens up to the light switches on the wall. Not necessarily planned that way, but hey, as Victor said – tell no one!
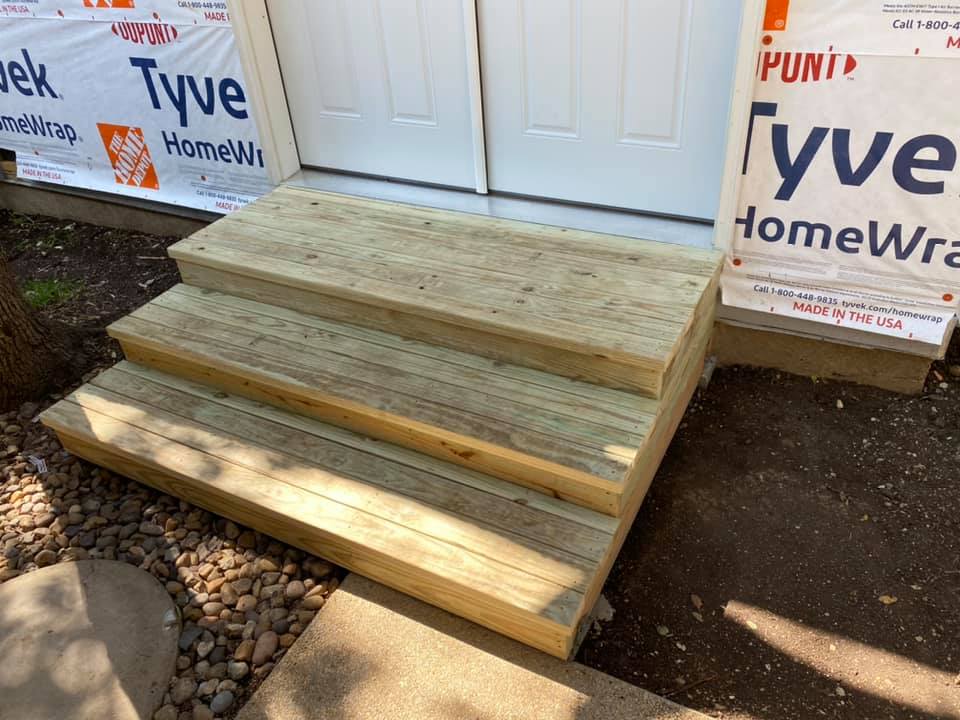
The quality of the door is excellent for a box store special. It’ll have to be customized a little bit because the casing is designed for use with a much thicker wall. My next job is to modify the casing and rebuilt the brick molding so it goes better with the siding choices I’ve made. FYI, as far as modifying products, this is the only thing that I’ve had to change; otherwise, most everything else is stock. By the way, the offset of the door anticipates accommodating the inside walls and trim, and the threshold has treated lumber underneath that tie into the steps. As you can see, the threshold and top step meet perfectly. Even though the casing will be cut back, the threshold will remain extended.
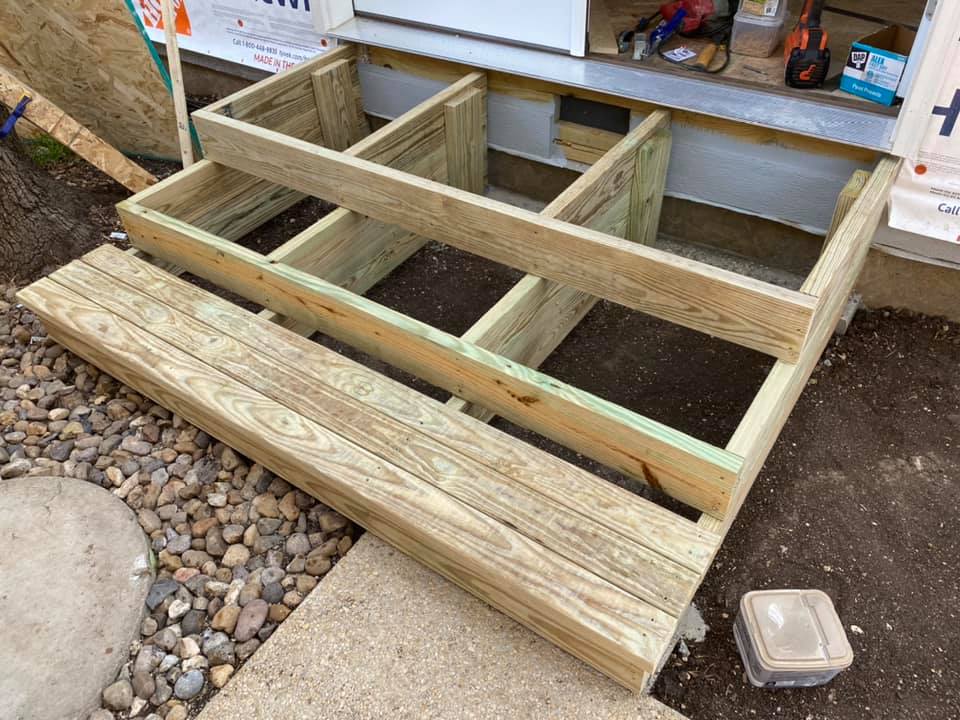
Also, finally, Joan Marie and our neighbor Ben are both relieved that, after months of stepping up 16″ to get inside the structure, I’ve built a set of heavy-duty stairs with treated lumber, rated for ground contact. Even though it’s ground contact material, I still poured two small footers and embedded some Simpson straps into the wet concrete to pick up the 2×6 stringers I built. Again, overbuilt. Surprise. I’m debating on whether or not I want to add hand rails, but I’ve constructed the stairs in a fashion where I can always add them later, if I decide I want them.
The framing here used all of my scrap treated lumber – happy it’s not going to the landfillTreads in placeDone!Door installedFrom inside
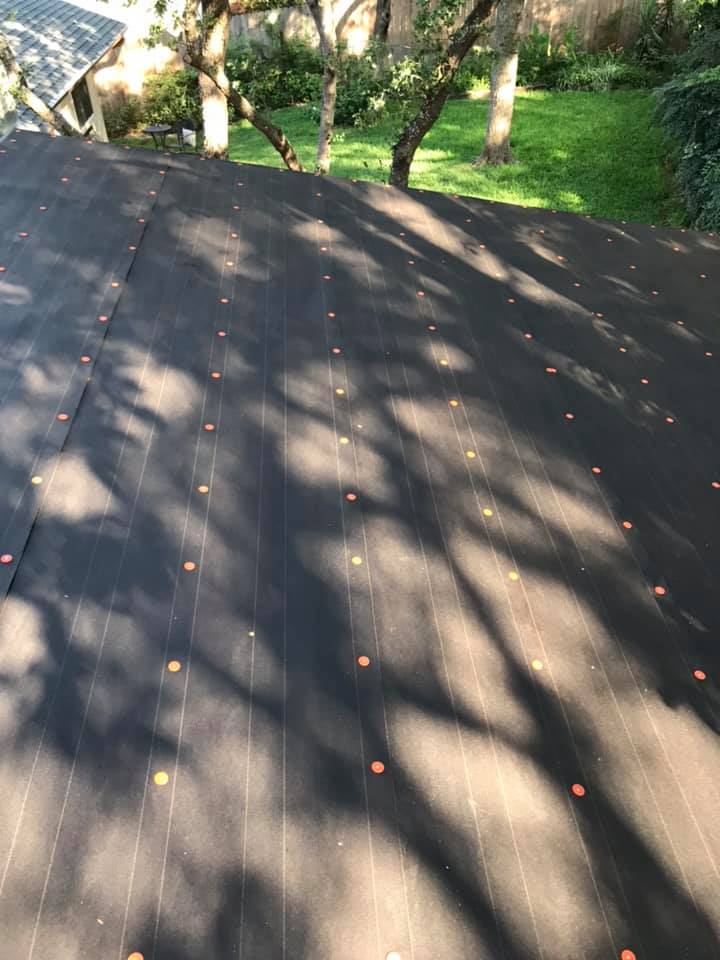
With the framing complete, it’s time to get some cover over the project! In other words, let’s build the roof! Here you can see the decking for the roof being nailed down and topped with roofing felt.
OSB for the roof deckA view from belowThe overhang will be trimmed back Trimmed and ready for roofing feltStandard tar paper felt with capped nails
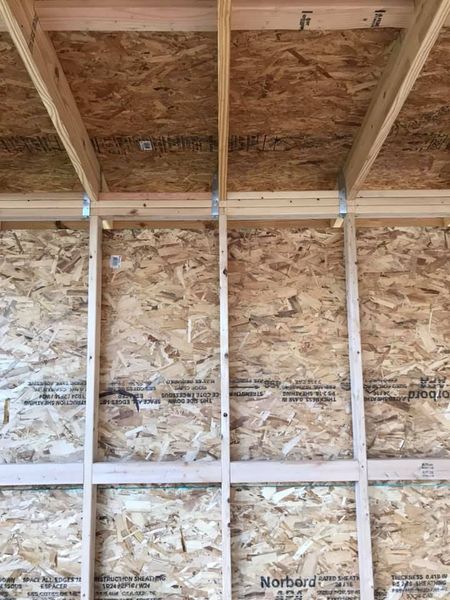
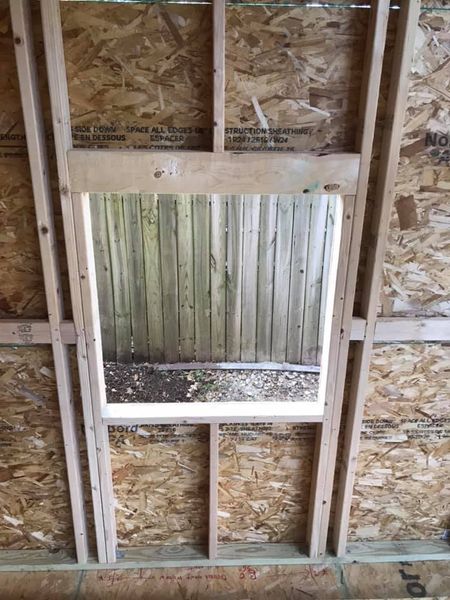
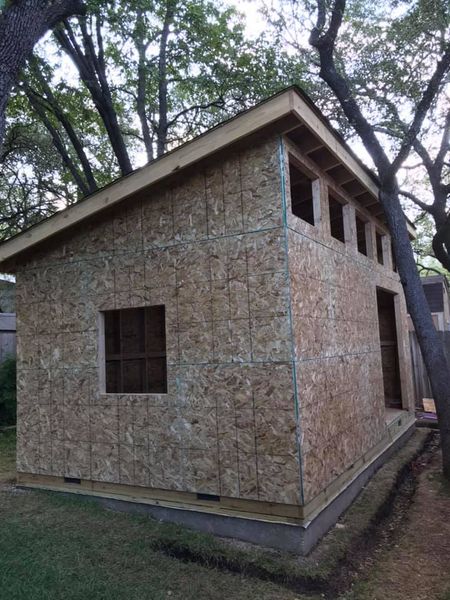
Once the felt is down, the walls start to go up. I’m using oriented strand board (OSB) for strength. Note the lines on the outside of the product help to align the nailing pattern with the studs underneath. All nailing is spaced about 8″ to 10″ apart, or about 5 to 6 nails for each 4′ length. I’m using a 2″ galvanized nail, slightly countersunk with my handy nail gun (love my Paslode gun! So easy to work with!. The countersinking of the nails is so that the Tyvek (see next step) goes down smoothly and will not be torn or damaged by a nail head that’s sticking up. Note that I’m also cutting out window and doors from the OSB, after it’s hung rather than before it’s put up. My approach to this was to skin the OSB right over the windows and doors, then drilling out the corners of each opening from the inside, the popping a chalk line on the outside to mark out the cut, and last, using the skill-saw to remove the OSB. The process gets very good results, as you can see.
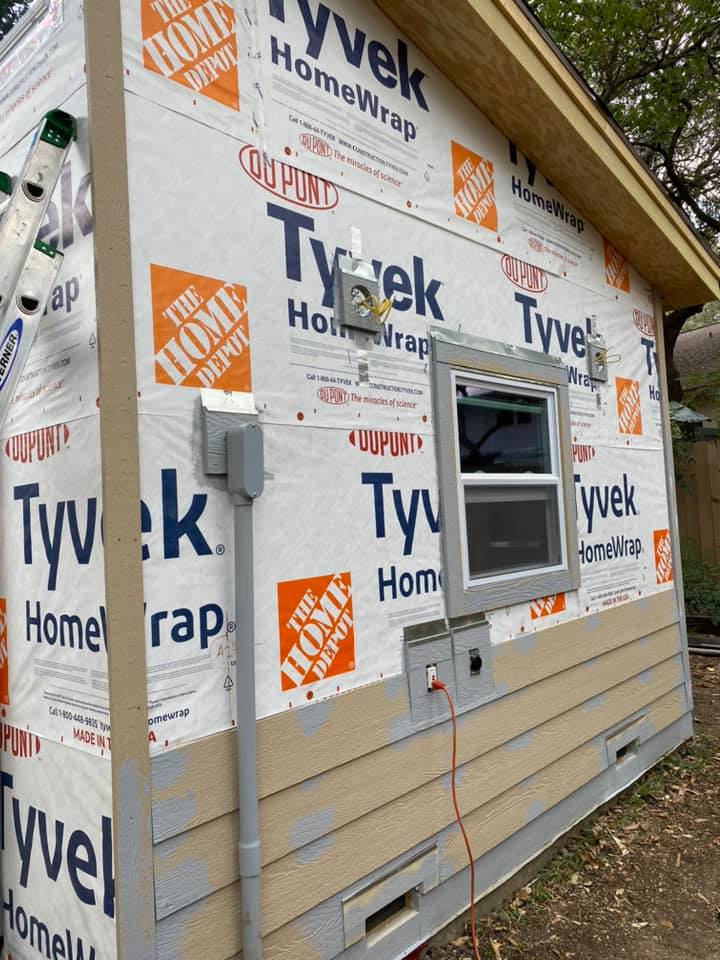
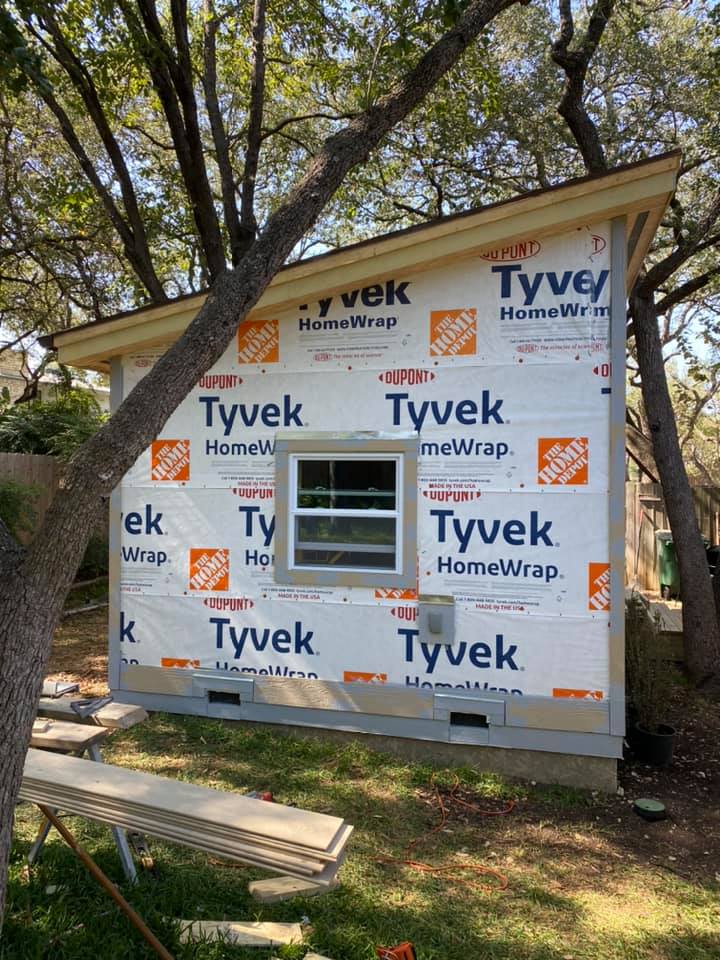
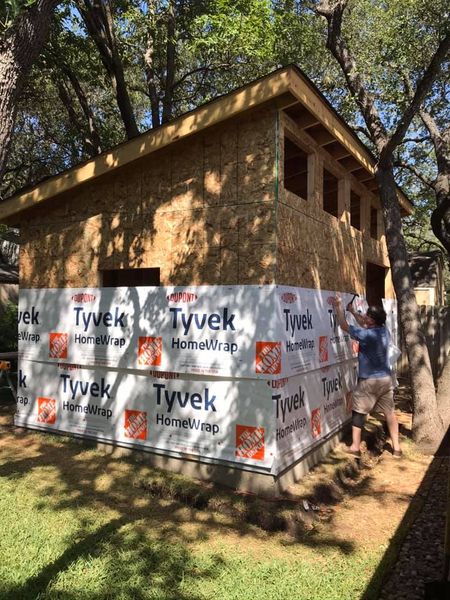
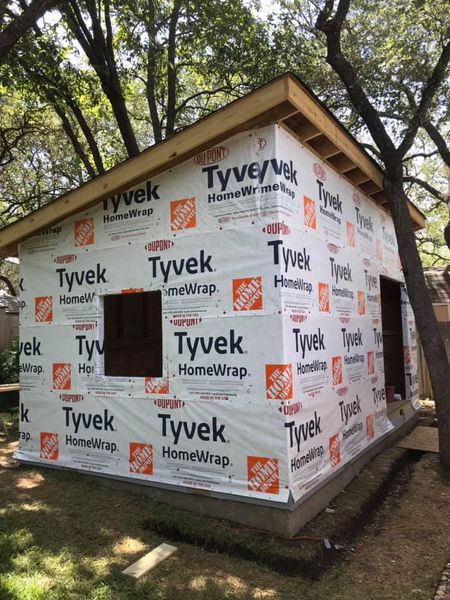
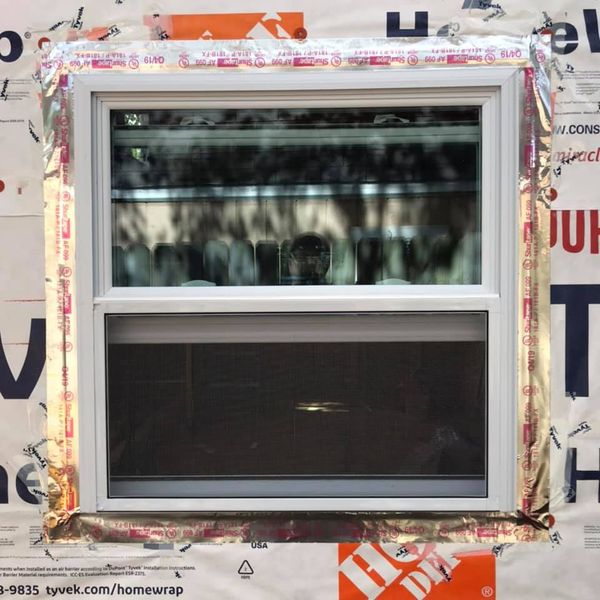
The walls need covering with a vapor barrier to protect the OSB from moisture, and I’ve used Tyvek here. It’s a great product that I’ve used for years, and it’s hung using capped roofing nails that simultaneously help me to keep track of my studs. That’ll be very helpful when it comes to hanging the clapboard in the finishing stages of the studio’s exterior. Note that the Tyvek is “shingled” – in other words, I start from the very bottom and layer each row with an overlap of about 8 inches to ensure that any moisture runs down and out. Windows and doors are cut out and taped with special Tyvek tape to ensure a good seal.
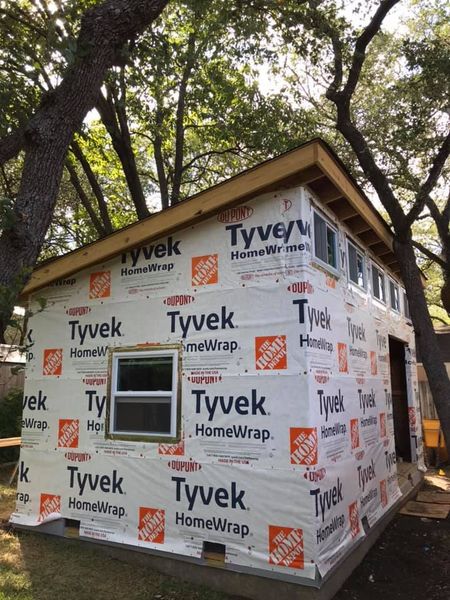
Installation of the windows is next, and I would have done the doors as well, but they’re back-ordered. As a side note, it’s been interesting working on this project during a pandemic, because I’m apparently competing with everyone else for materials. It seems that folks want to work on projects, and they’re suddenly able to do so because everyone’s working from home. A trip to the local hardware store is an exercise in creative thinking about alternative approaches when something is out of stock (nails and screws at one point were as hard to find as face masks). My doors have been delayed twice now, but it looks like they’ll be here (fingers crossed) next week. Note that the windows have an aluminum flashing tape around them. That tape sticks extraordinarily well to the vinyl edges of the windows, and to the Tyvek. A piece of galvanized steel flashing will go over the top piece of window trim that frames the opening. Two layers of moisture protection to keep the water out!
More OSB for the sidingInside shot – 2 feet on centerSiding around the window openingProgress is steadySiding is complete!Time for the Tyvek vapor barrierStart at the bottom and work your way upRunning right over the windowsWindows installed and trimmed with aluminum tapeA shot of the clerestory windowsDetail of one of the side windows
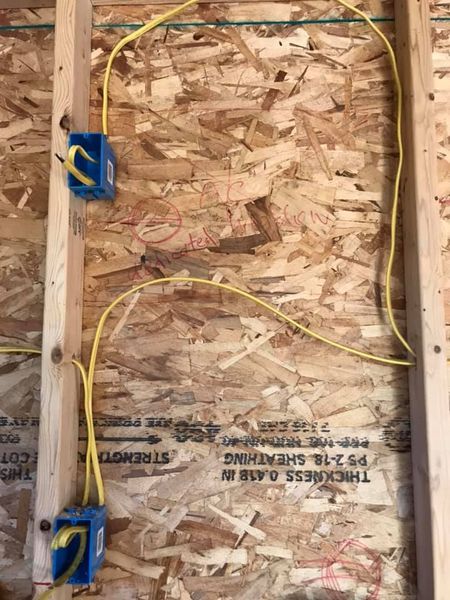
Last, for this update to the studio build, you can see I’ve begun to do the rough wiring for the studio. The service is run to the building underground (more digging ditches! ugh!) and will come up to the panel on the inside. I’m running 100 amps, 50 for the MIG welder and 50 for the rest of the studio. The circuits run the lights and outlets, and yes, air conditioning! I’ll have some lights and outlets on the outside as well. I’ll confess that I hate electricity, and I’m not comfortable hooking all of this up, which is where Victor comes in. He’s a master electrician and has a little time to help inspect my rough-in work and make sure all the connections are legit!
Installing junction boxes and running cableBuilding in a little cushion for future flexibilityLabel everything!
That’s it for this post! Thanks for reading! More to come!!
So, work continues at a fairly good pace on the construction of Liberty Oak Studios!
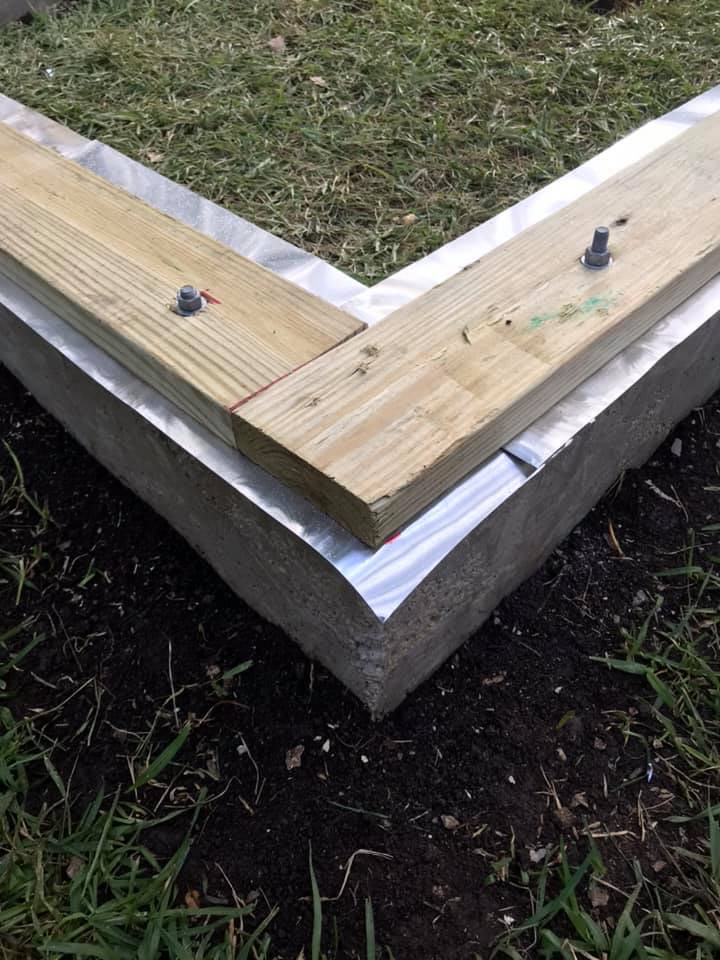
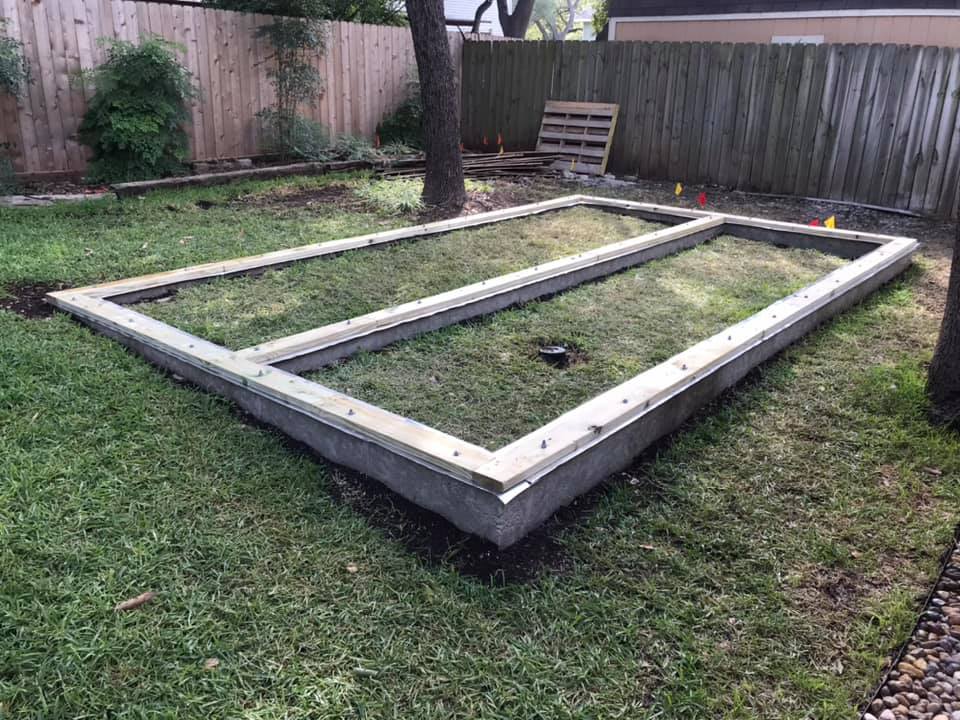
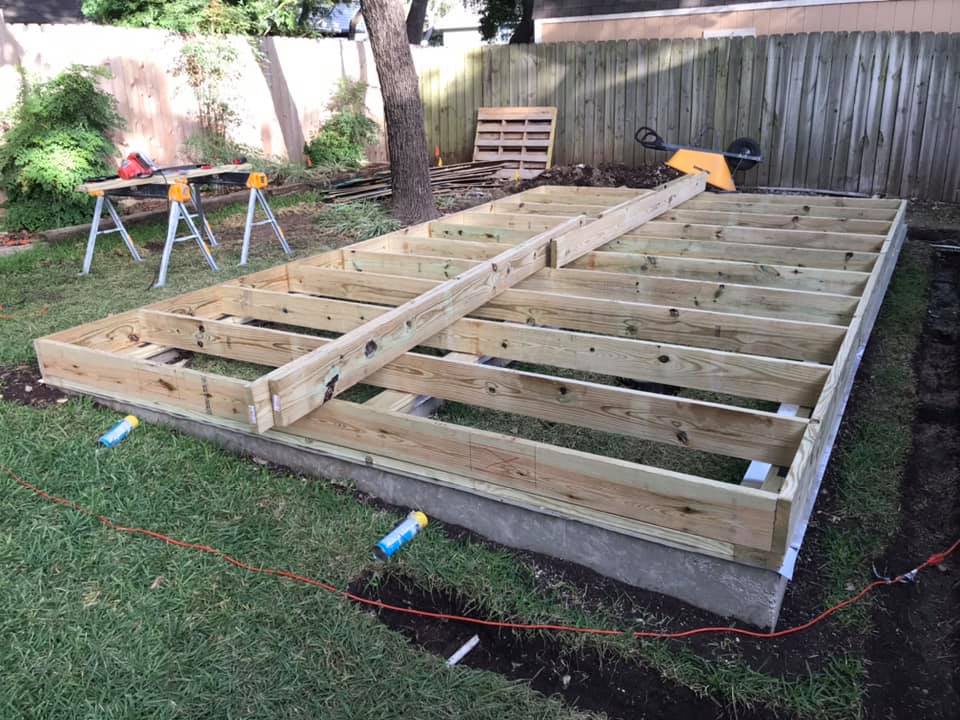
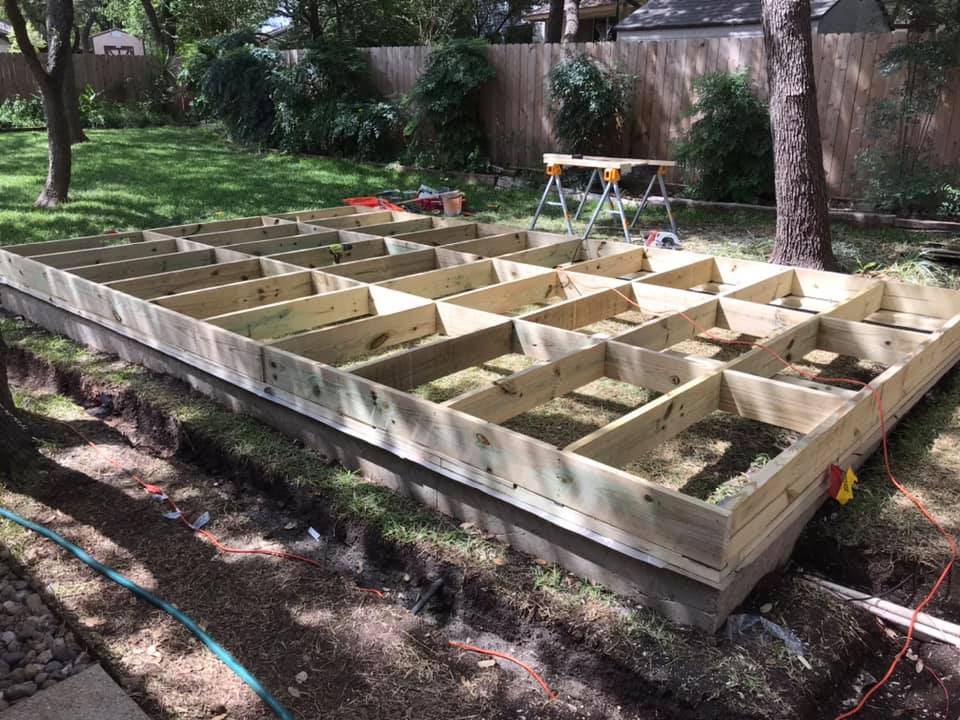
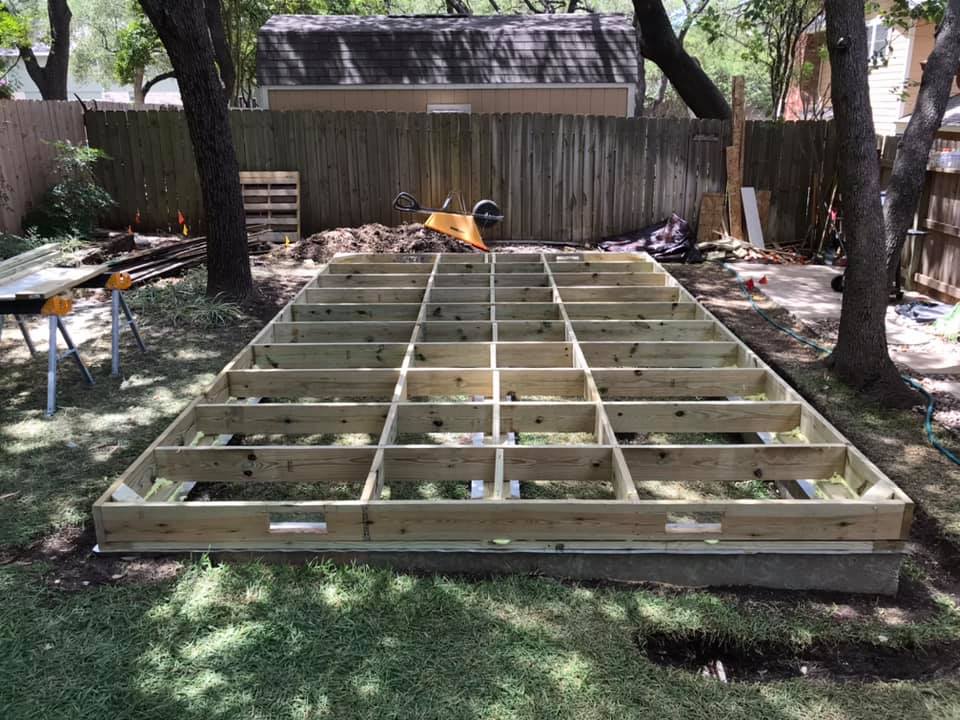
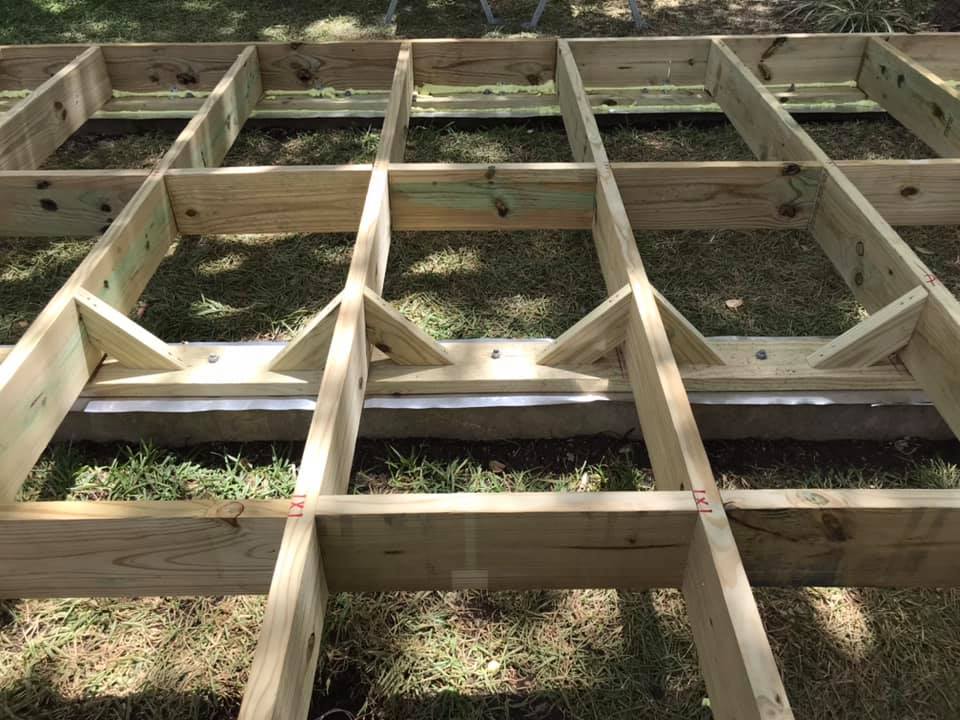
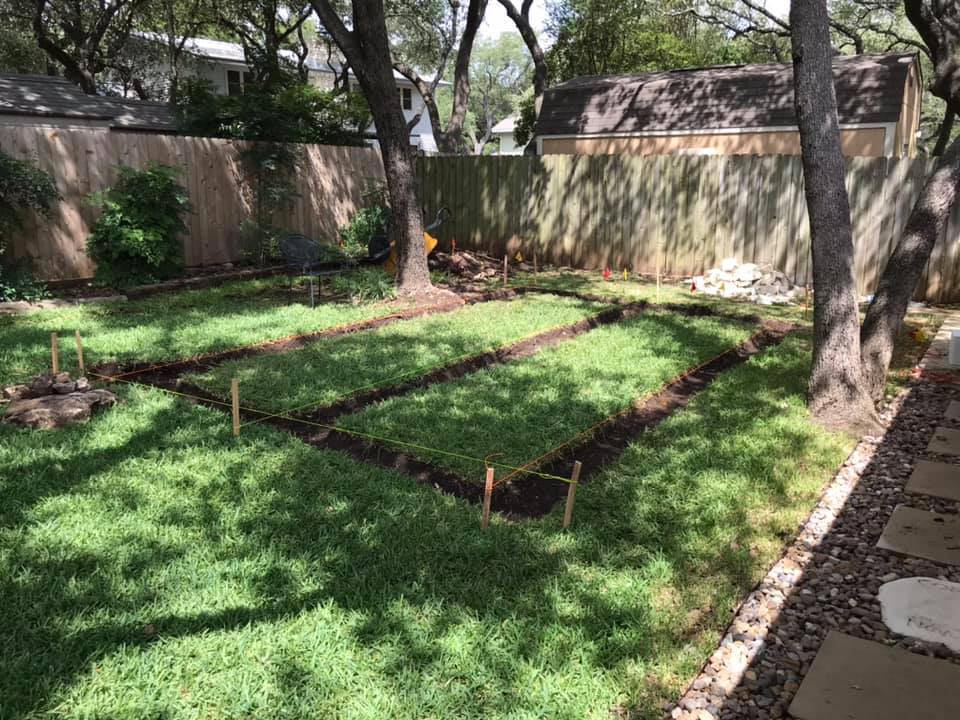
The foundation work was completed, and next we moved on to the framing for the floor. Below are some shots of how the floor joists were laid and trussed for maximum strength while keeping the project affordable. Using load tables found online, I was able to calculate the live and dead load minimums supported by 2x8x12 treated pine floor joists, augmented with a center transom beam. You can see the layout below, which features a truss system I designed for the transom. It makes the whole floor incredibly rigid!
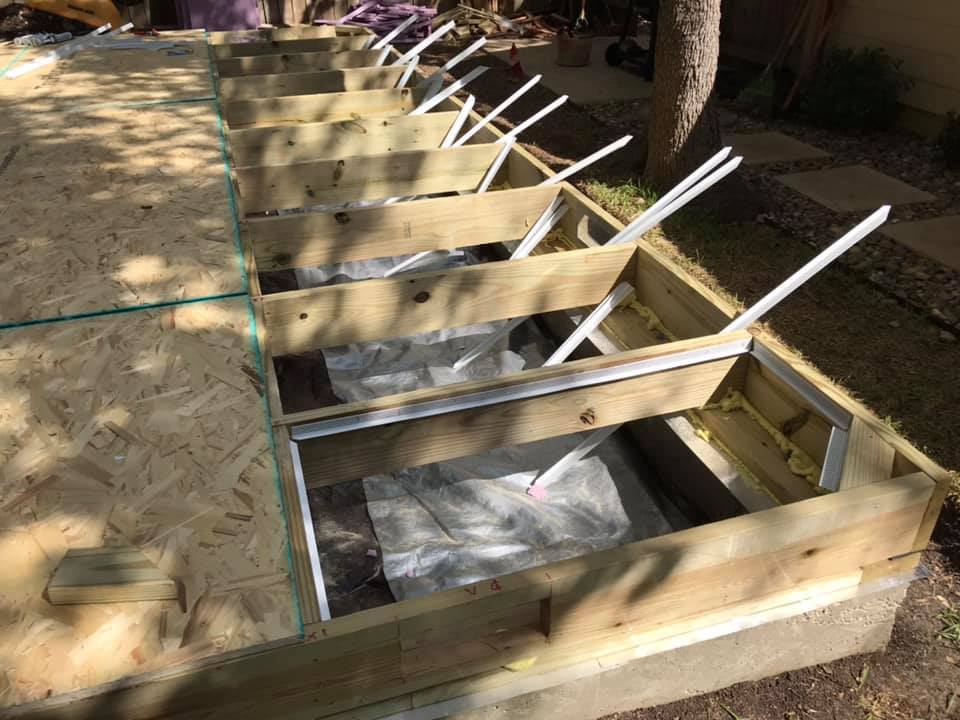
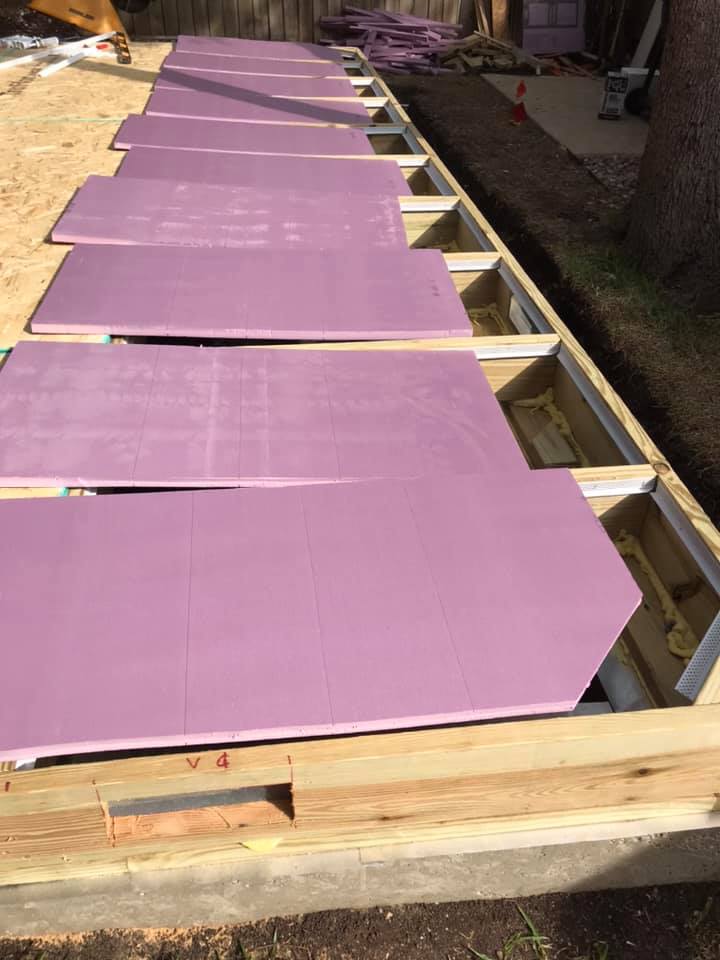
Insulation and the creation of a vapor barrier system begins after the joists are complete. I came up with a dual system that used PVC corner bead to create a bed in which the 1″ polystyrene foam rests, and silicone caulk to seal the gaps for an effective vapor barrier. Note that the ground also has a reinforce plastic tarp to act as a barrier, held in place by rocks. With the ground covered with a plastic vapor barrier, and the underside of the decking covered with a polystyrene foam as a vapor barrier, the underside will remain dry thanks to air movement through the 8 vents (2 on each side) that are cut into the joist’s band beams.
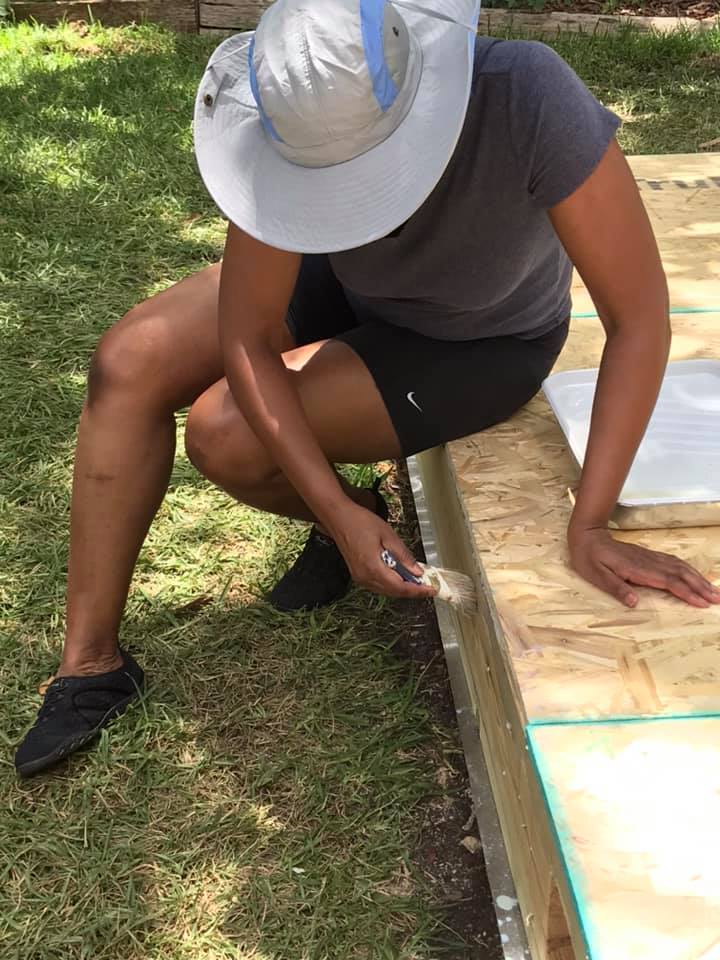
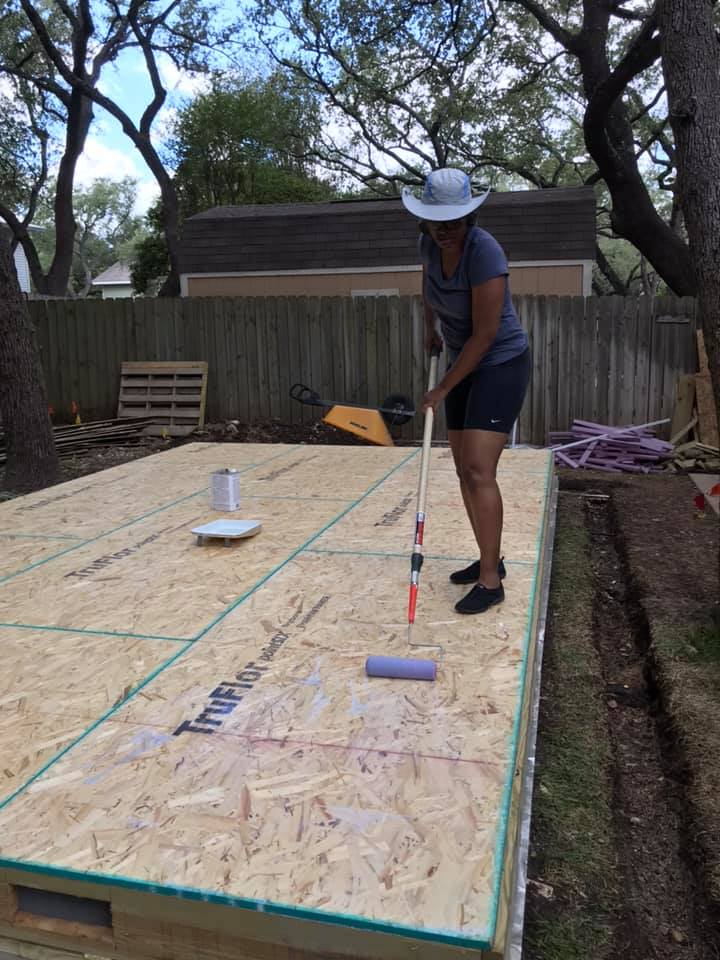
As the decking is complete, sealing the seams and the surface becomes important. The decking is rated for exposure with water-resistant binders holding together the oriented strands, but I don’t like to take chances, so Joan Marie helps me out with the sealant work. Again, not an essential step, but I have a genetic predisposition to overbuilding things!
Flashing barrier for bugs and moistureBolted down with silicone sealPerimeter and transom plates doneFloor joists in placeBlocking to improve rigidityBlocking completedInverse truss idea to spring floor and levelPVC corner bead to hold insulationProduction mode to installPre-cut sections drop inSilicone seal around the edgesDecking securedDecking – second viewApplying sealantRolling the subfloor with sealant
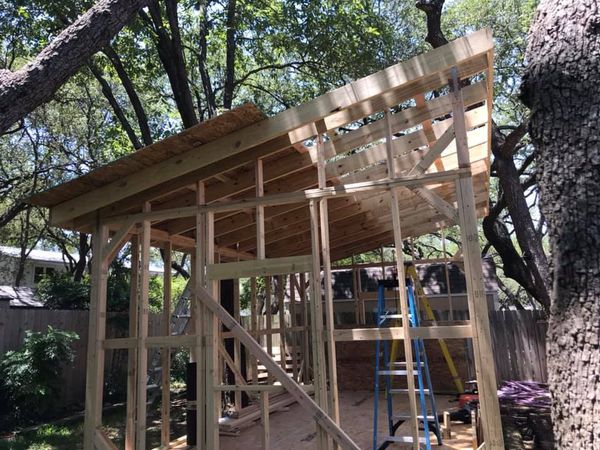
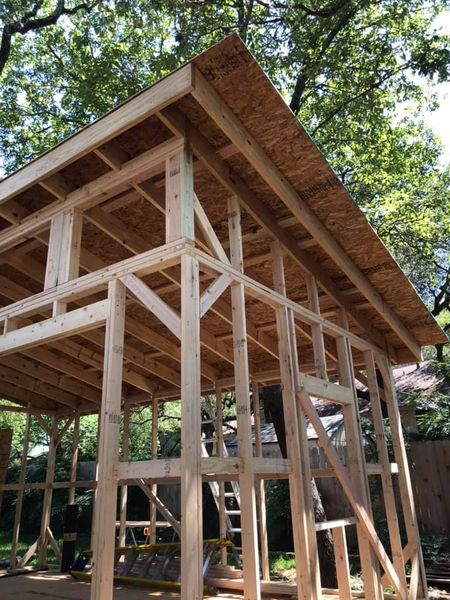
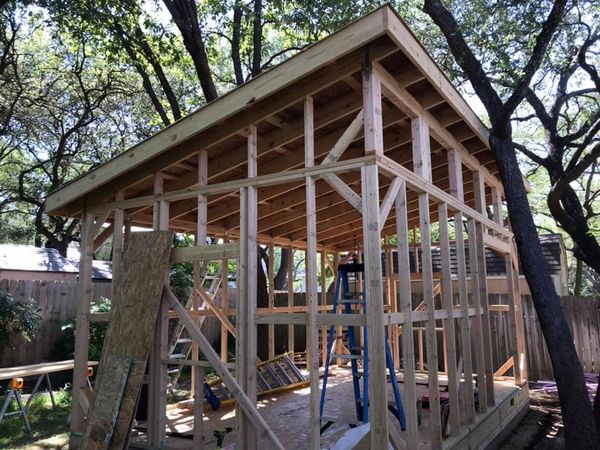
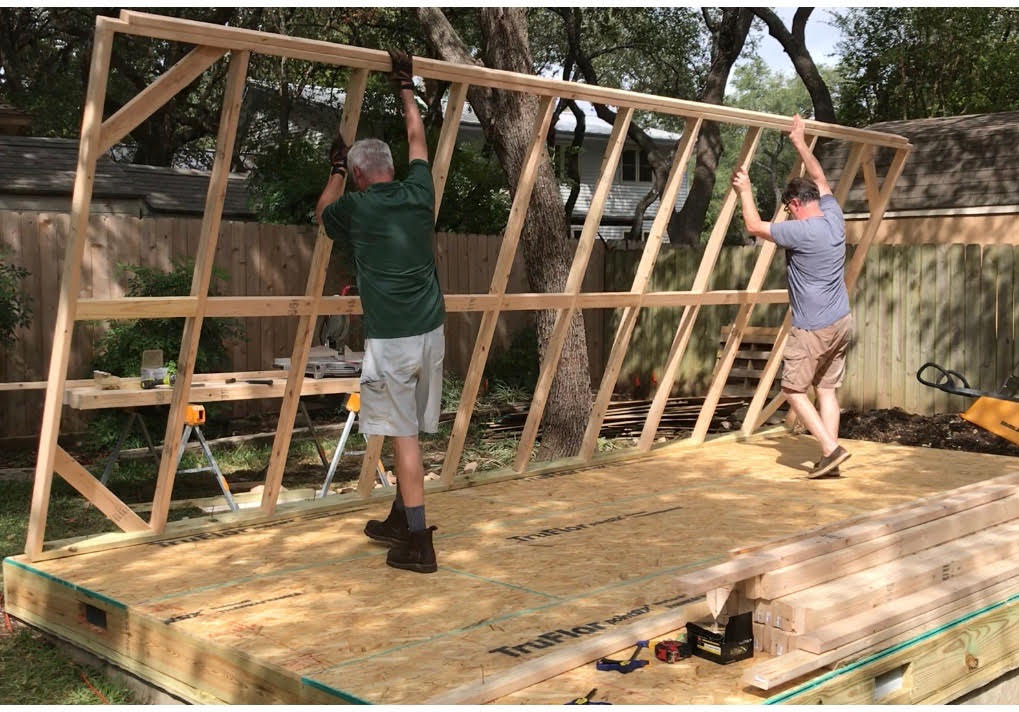
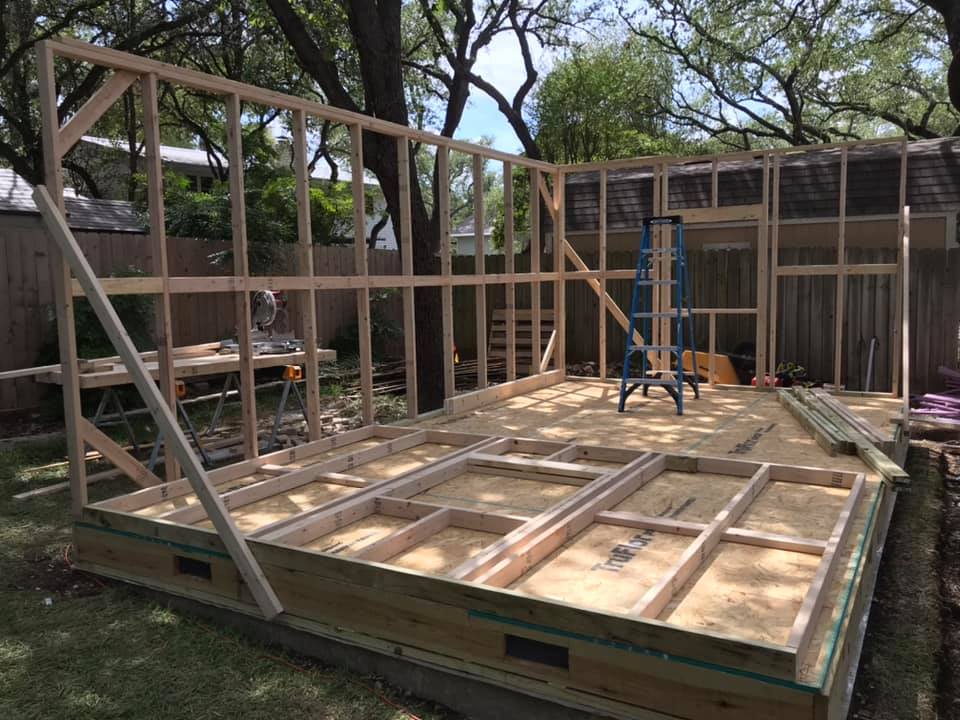
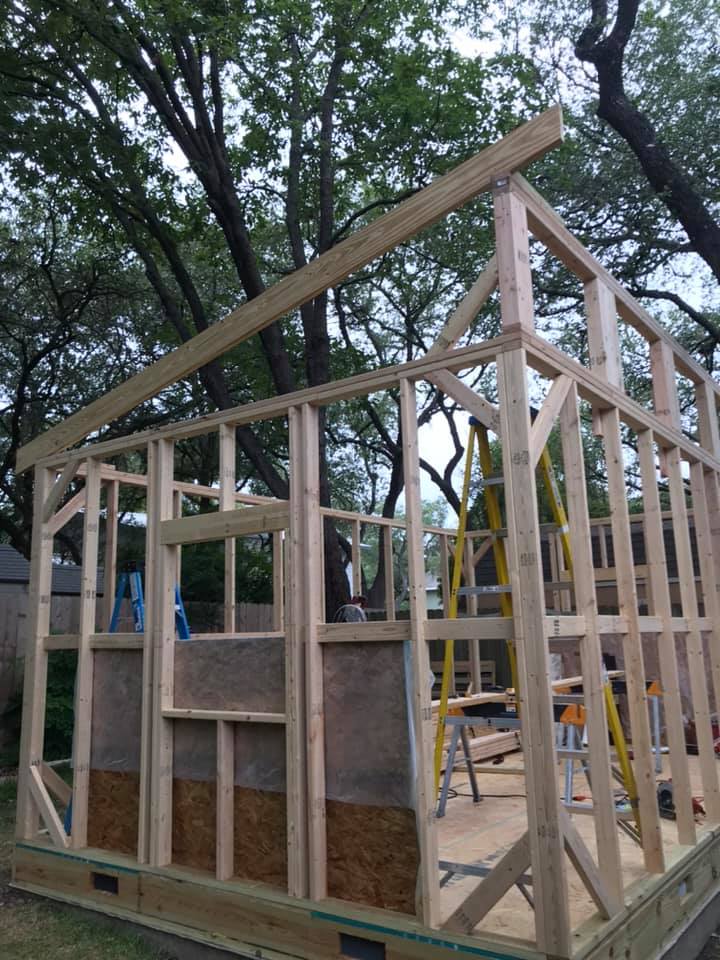
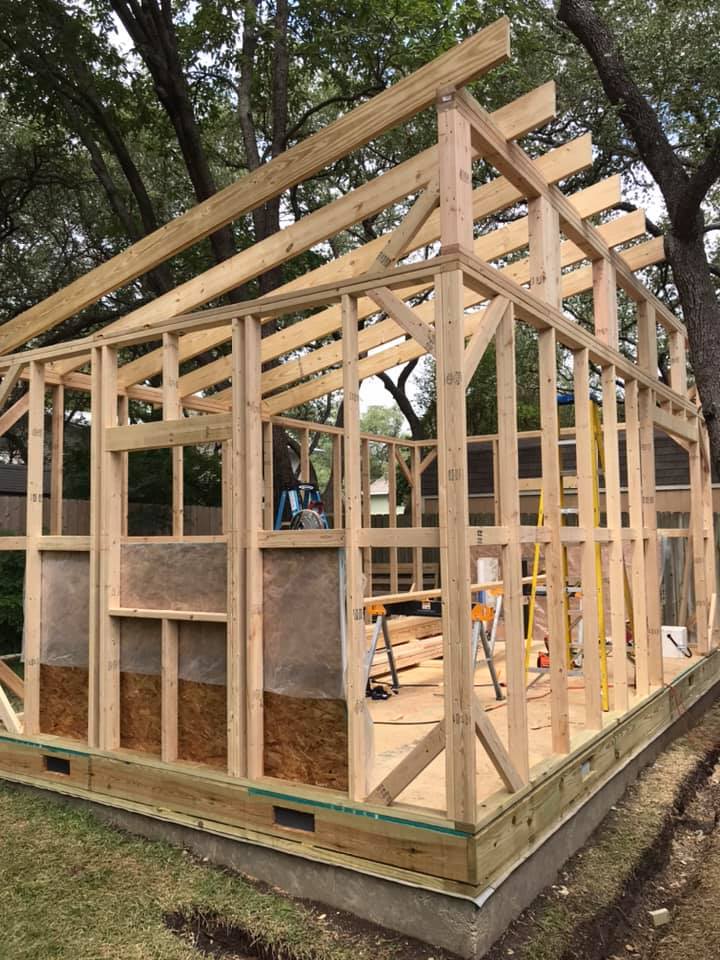
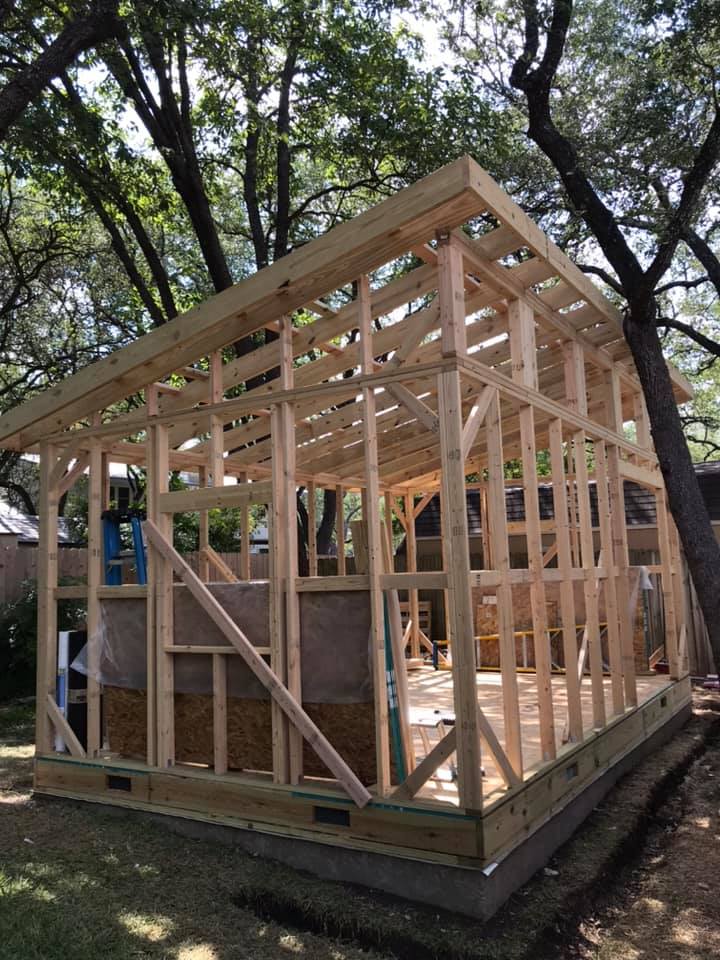
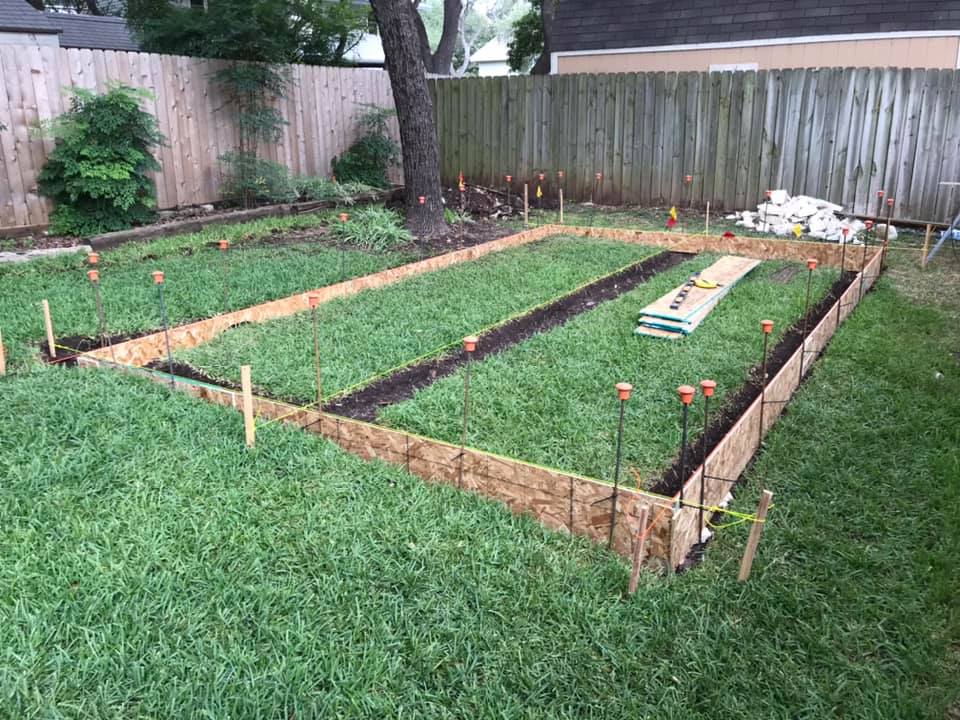
Once the floor joists are set, insulation added, and decking glue, nailed and sealed, framing for the walls begins, With many thanks to my neighbor Ben, who helped lift the walls into place, the whole process goes smoothly. As this building will have an OSB (Oriented Strand Board) skin (with a clapboard veneer), and OSB interior walls as well, the framing is 24″ on center instead of 16″ on center. With plywood on the outside and inside, it will be very strong!
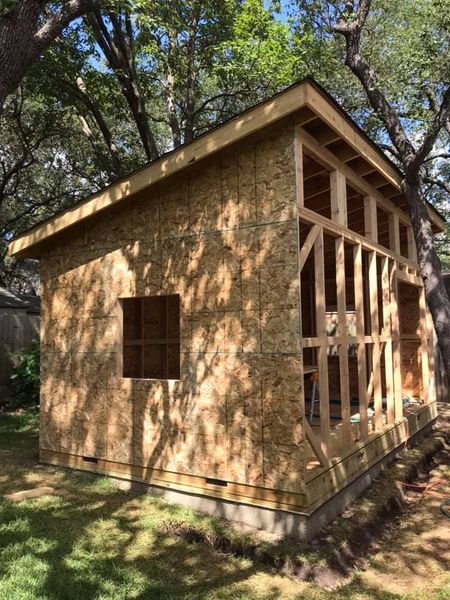
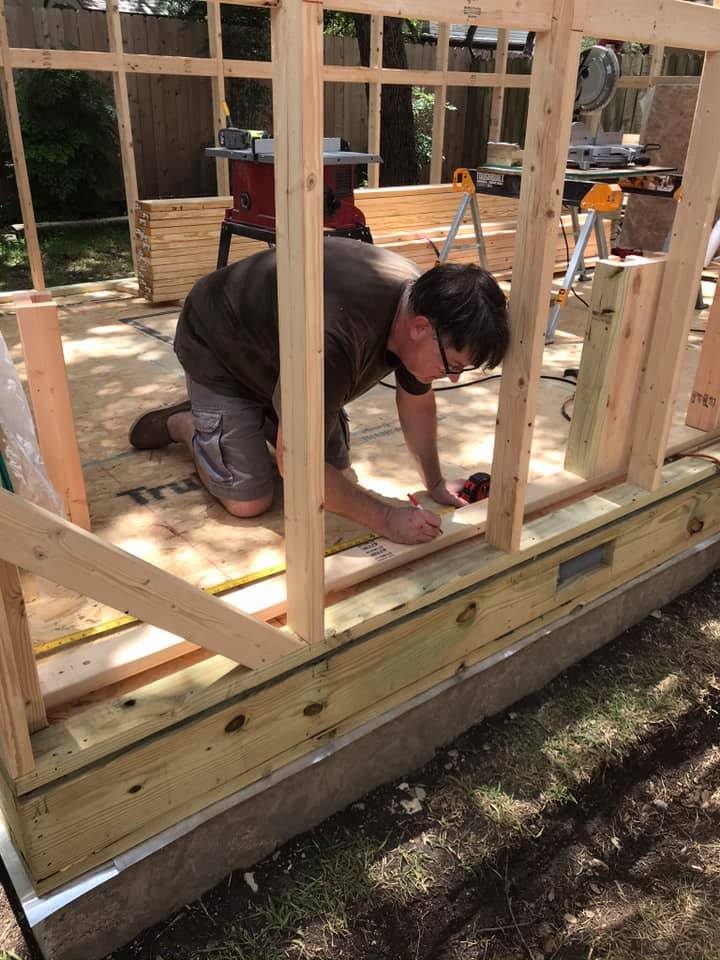
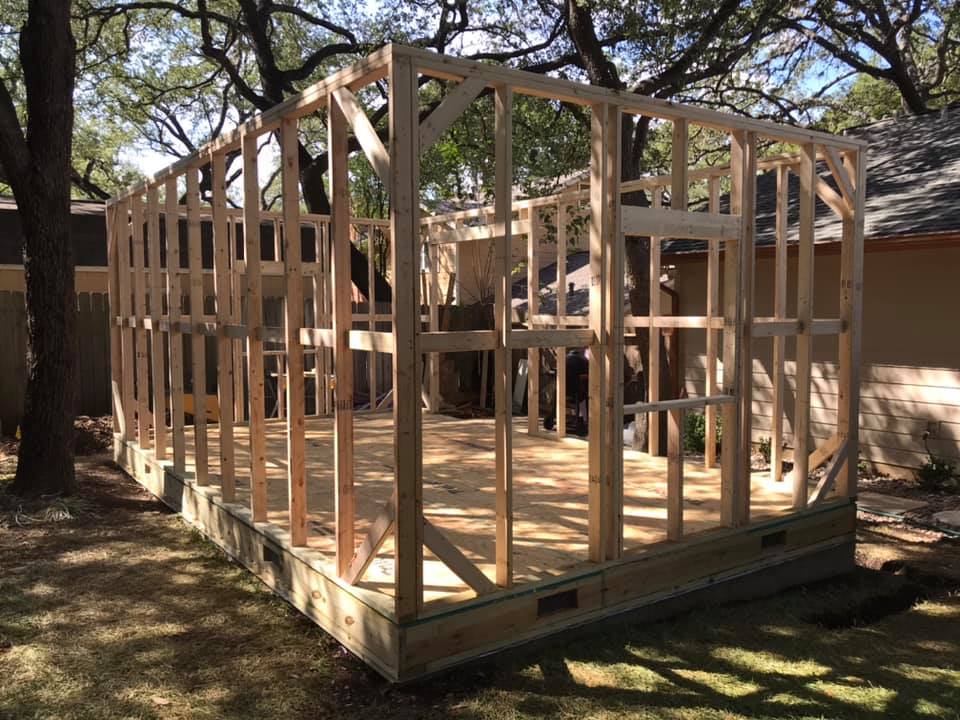
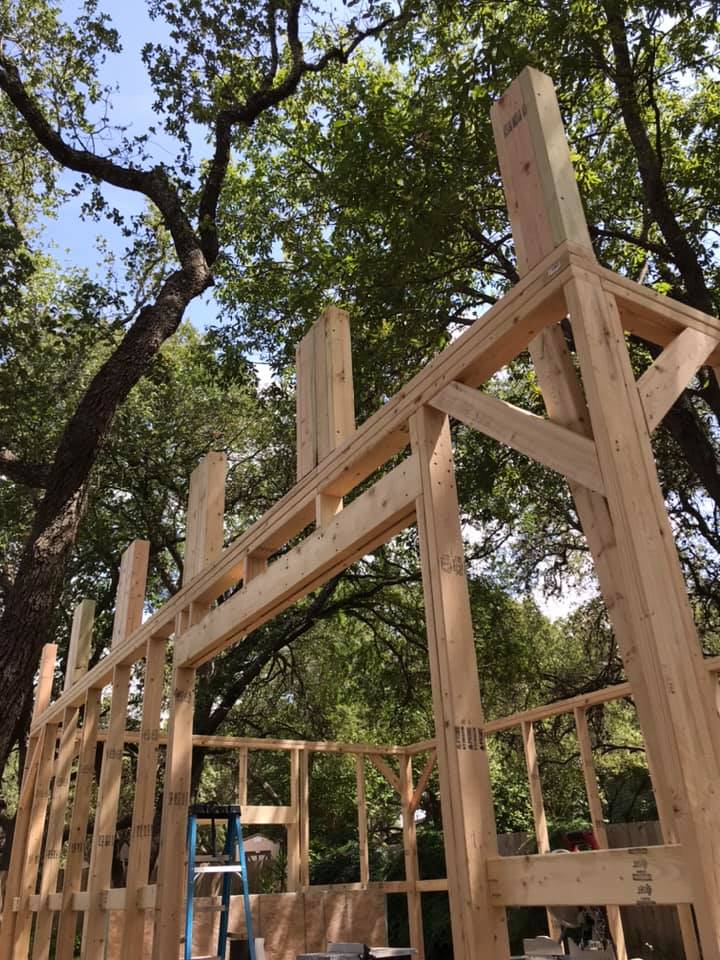
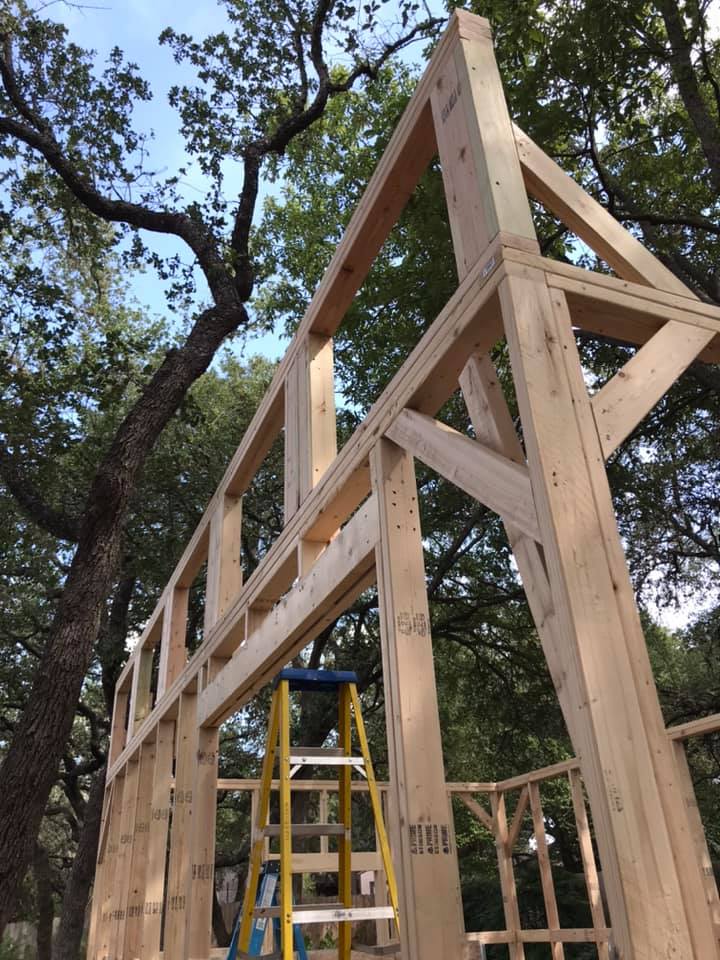
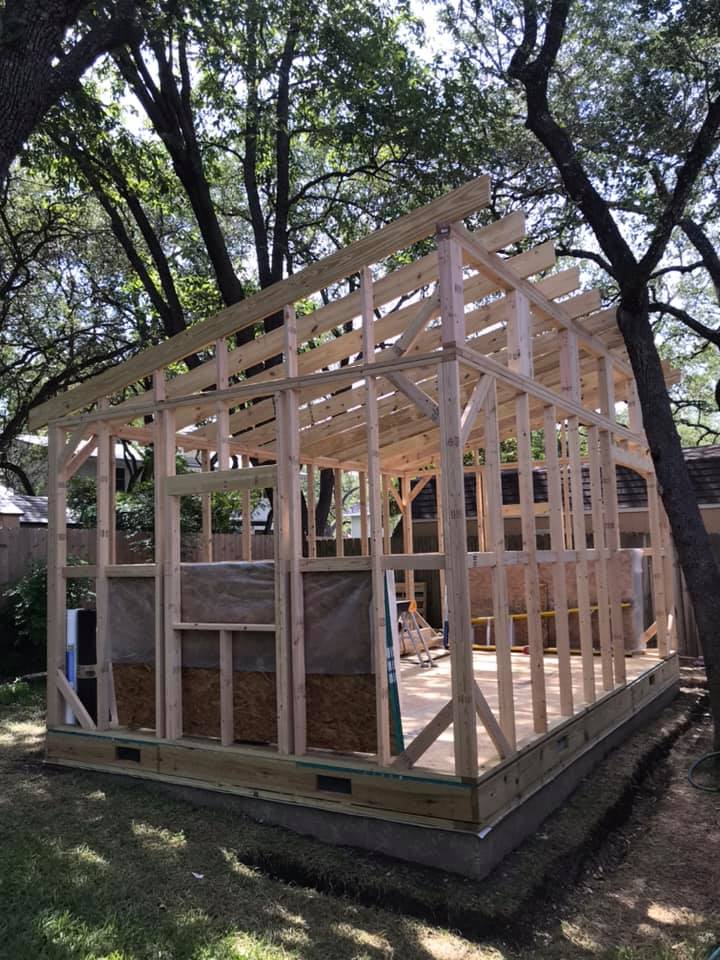
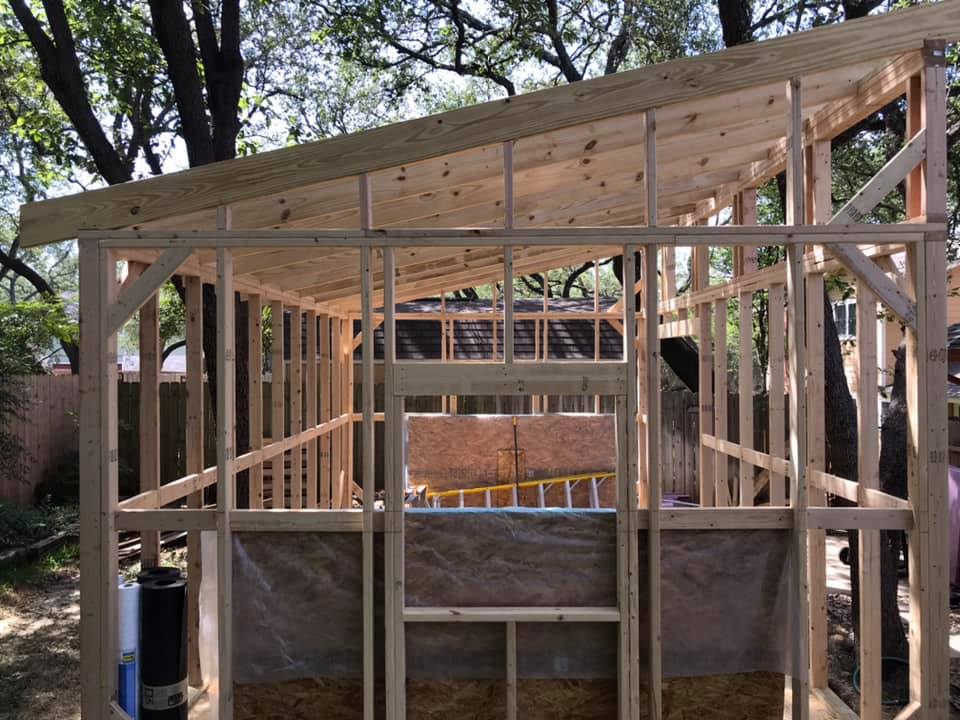
After the walls are made plumb and square, additional bracing is added to ensure that the building does not twist or rack as the roof framing is added. Once this reinforcing is complete, I began to frame up the primary support for the roof on top of a triple top plate. These supports are very heavy duty because this elevation has within it the clerestory windows that will run the length of the east wall. With the framing completed by the setting of the rafters, the blocking and the rafters’ band beams, we are ready to move on to the next stage! The next blog post will feature the decking of the roof and the skinning of the walls, and maybe we’ll get our windows and doors in too!
My neighbor and friend, Ben, lends a hand on the first wallFirst wall is plumbed and squaredTurning the cornerTurning another cornerScribing the top platesAll four walls are doneAnother view before going up againFraming out the clerestory windowsTop plate on top of the windowsSetting the first rafterMore raftersClosing the gable endsBuilding the outriggers and flying raftersReady for siding!
That’s it for this post! Thanks for reading! More to come!!
As promised, some updates on the progress of Liberty Oak Studios under construction!
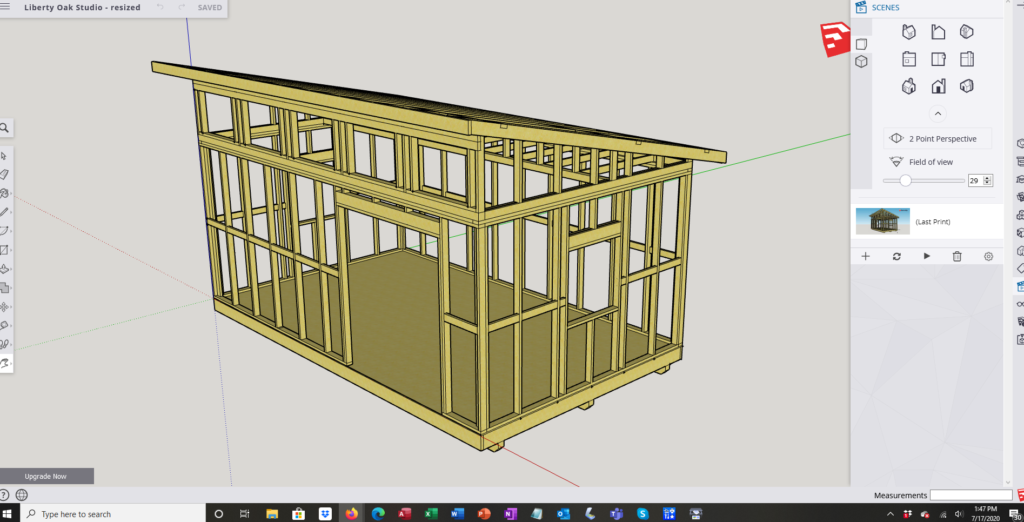
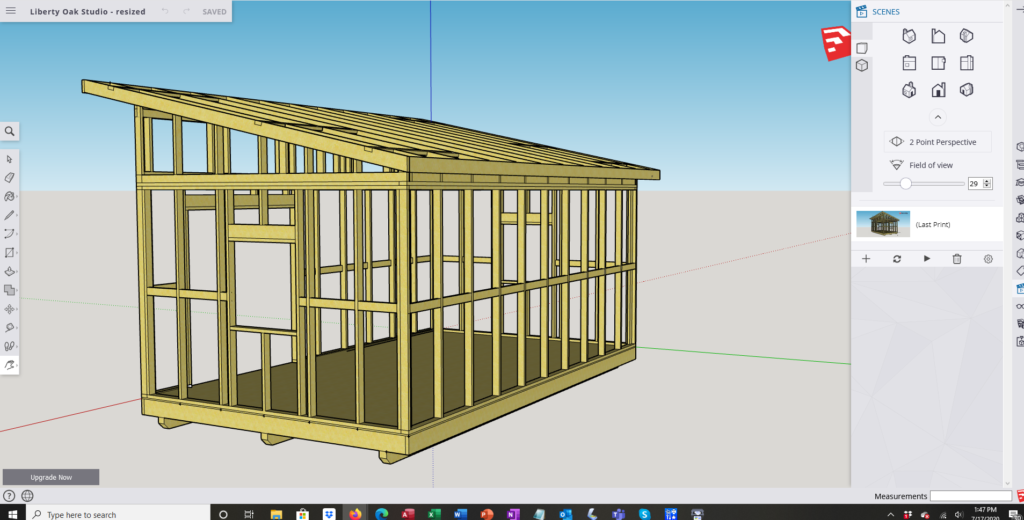
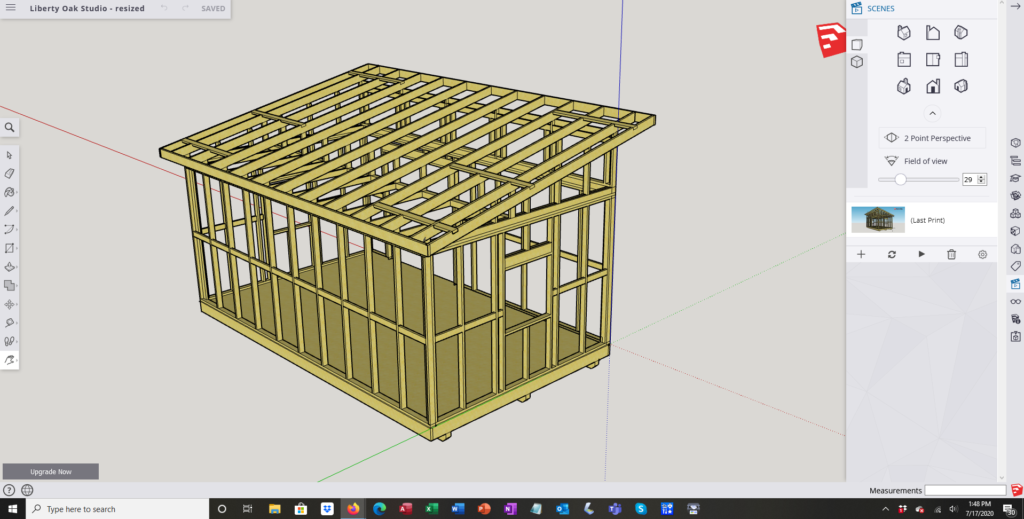
Everything begins with a plan and here’s ours. Joan Marie and I settled on a simple design, a 12′ x 20′ rectangle that didn’t force us to remove any trees. It will serve as the studio for my sculpture work. The drawing below was done for budgeting the framing, done in SketchUp, it shows the basic shape of the building.
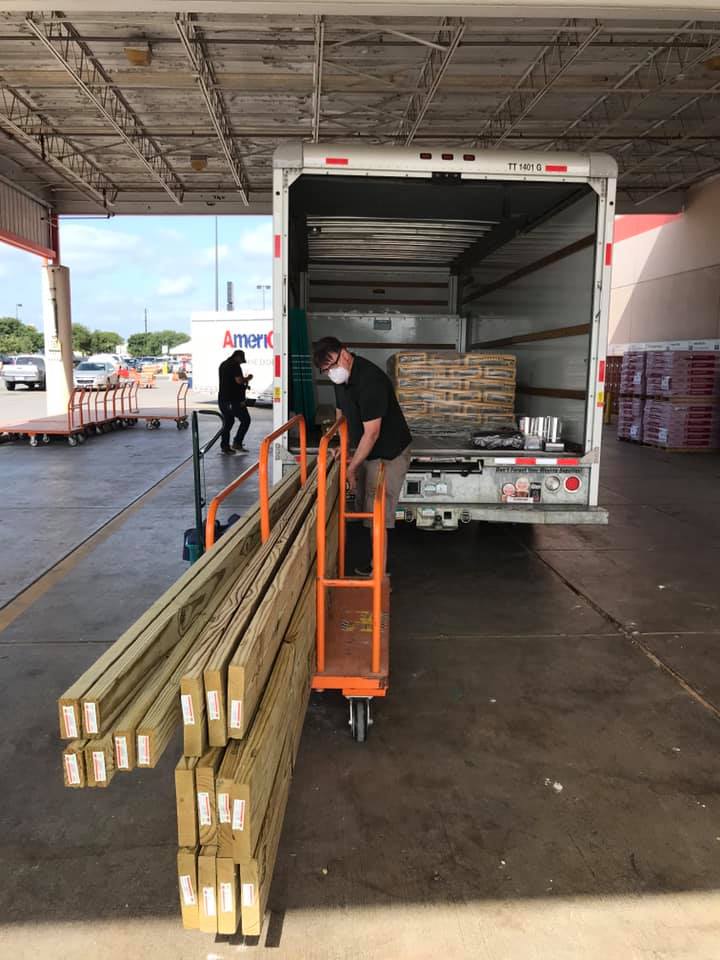
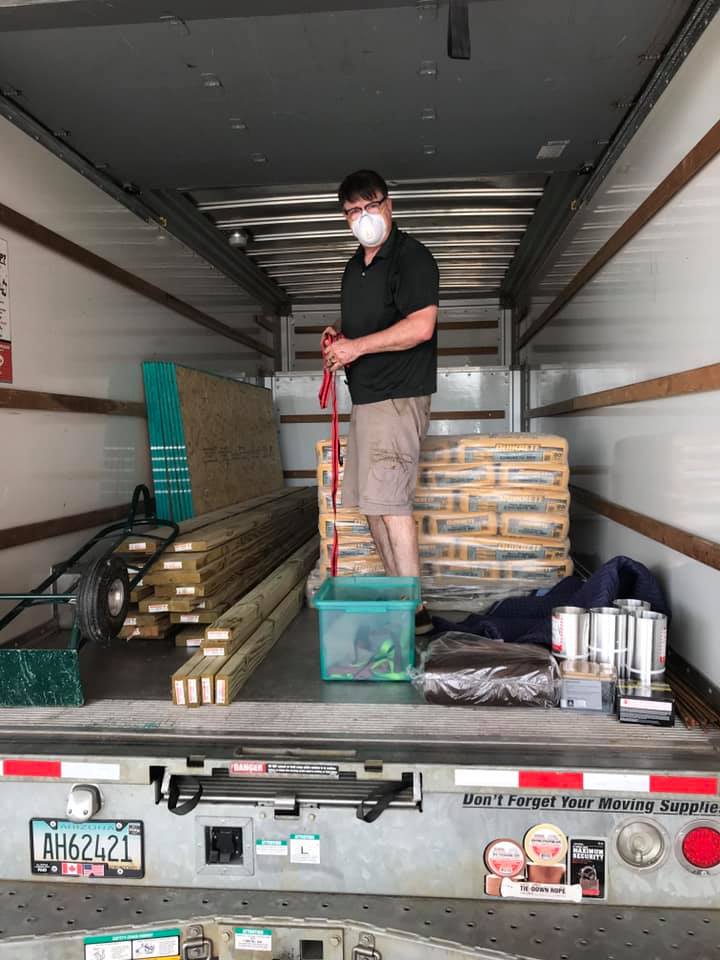
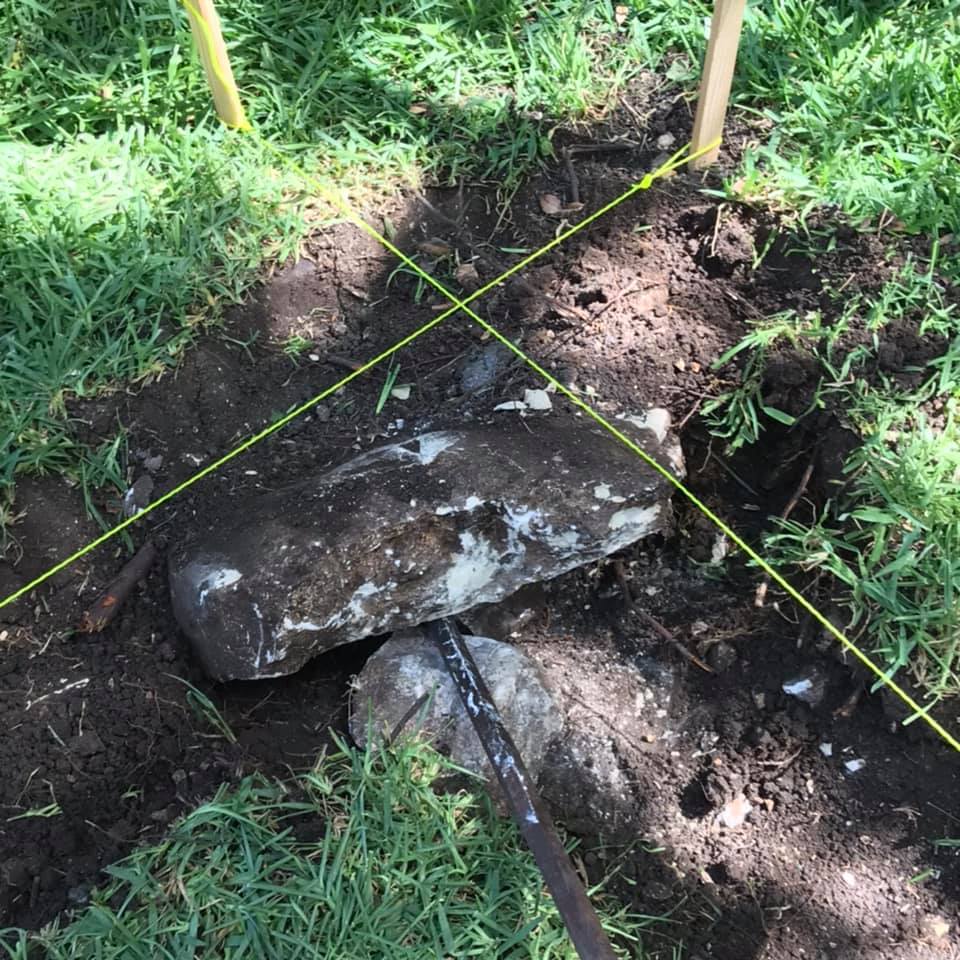
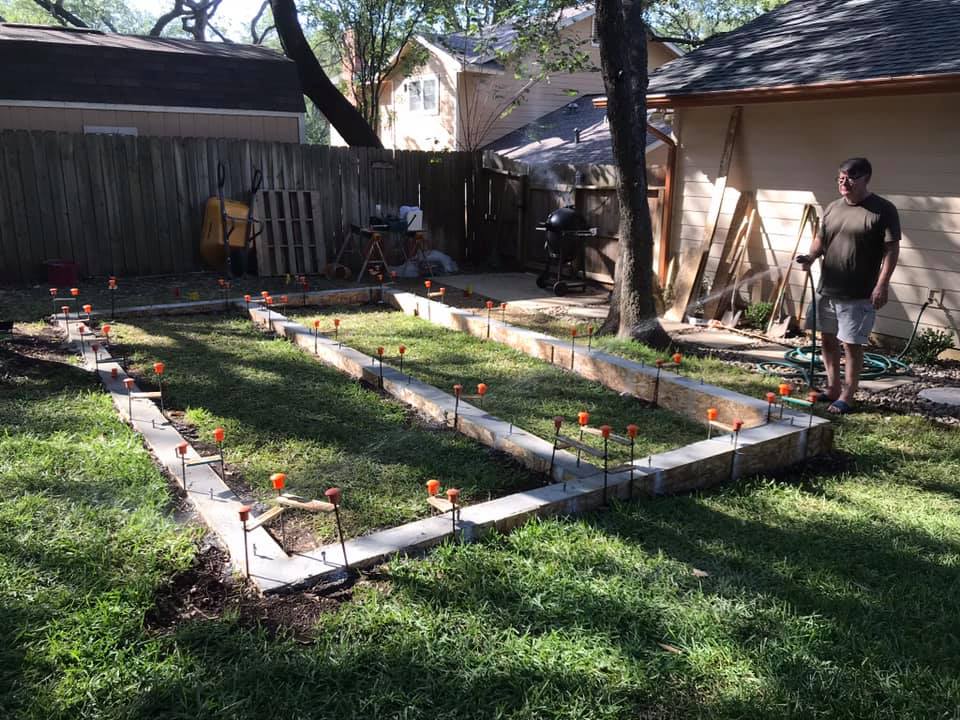
With a plan complete, Joan and I head to the local material store and purchase lumber, steel rebar, concrete and more! Oh, and the footer holes need to be dug, in 100+ degree Texas heat, no less!
Phase 1 is a trip to the hardware storePandemic project evident by the maskHoles for concrete footersMore holesThe layout – perimeter footer with a center transom beam
With the holes dug, now it’s time to form the footers with OSB plywood, and drop in the steel rebar. It’s critical that everything be level and square as the forms determine the shape of the foundation and everything that sits upon it.
The perimter form is completeDetail of the cornerInterior forming is completeDetail of the corner with reinforcing bar (rebar)
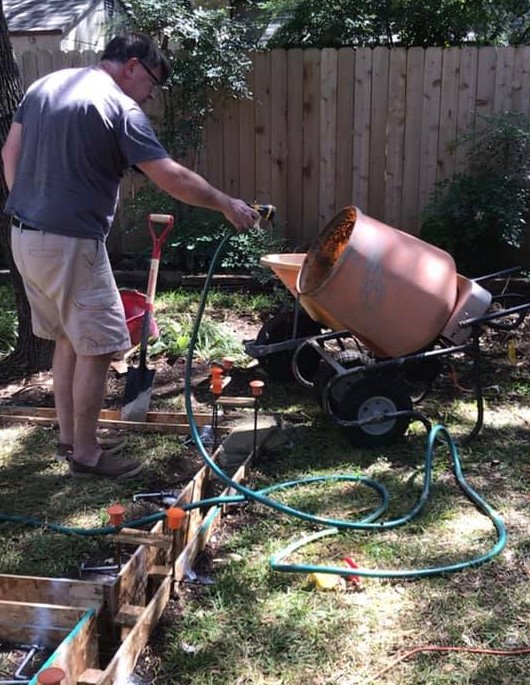
To ensure strength, once the forms are leveled and squared, they are filled with concrete in a continuous pour around the perimeter, thanks to Joan Marie, who is the most stylish concrete mason I’ve ever worked with!
Thank goodness for Ben – one of his friends let us borrow a concrete mixerFresh concrete finished by Joan
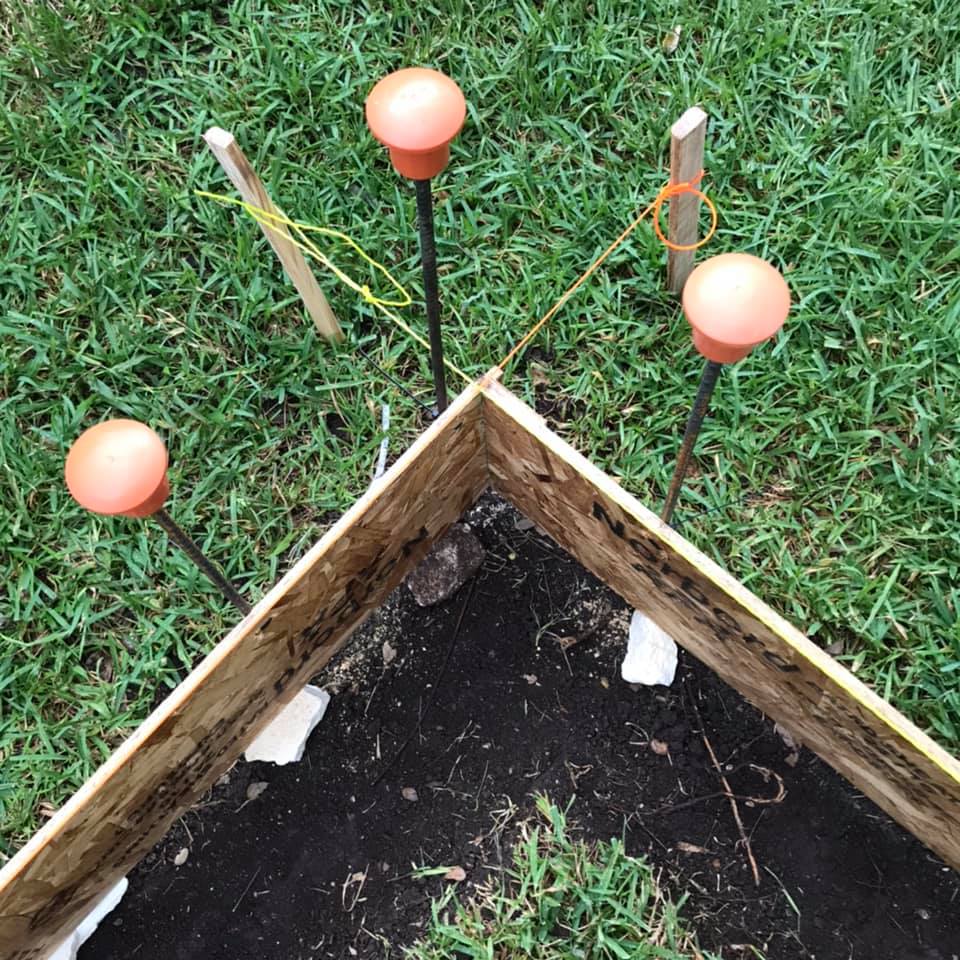
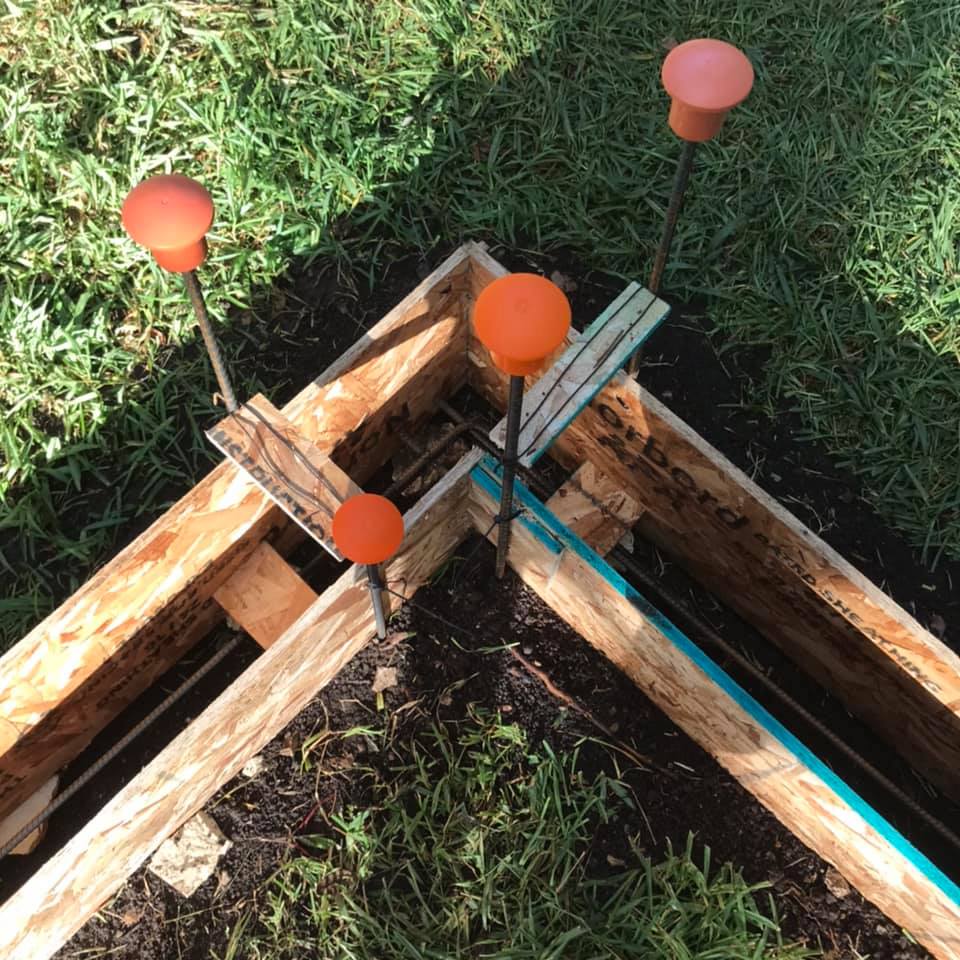
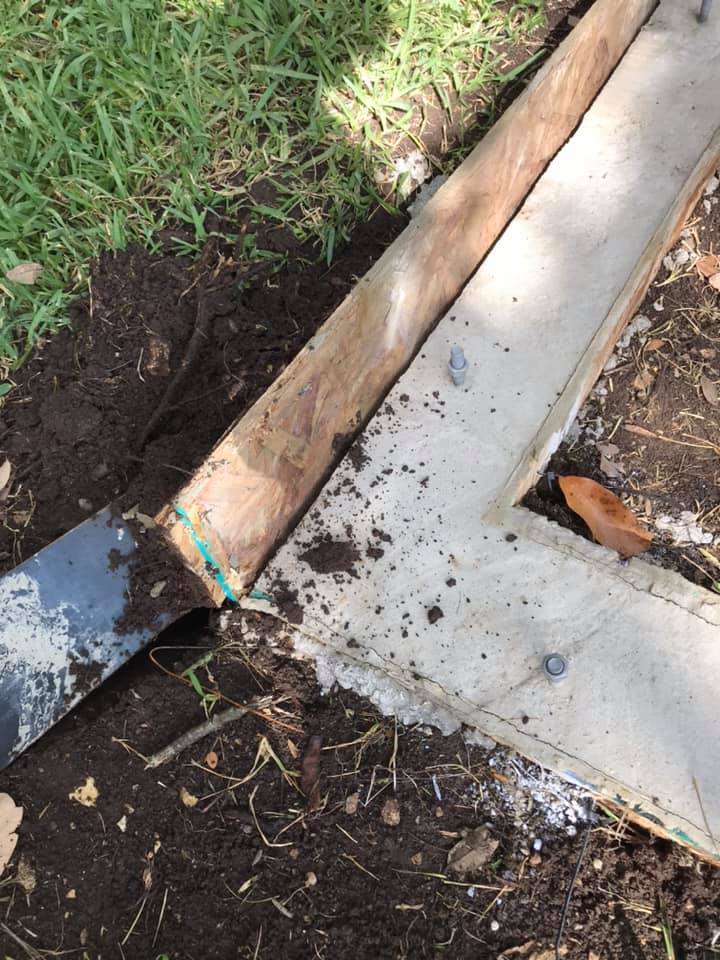
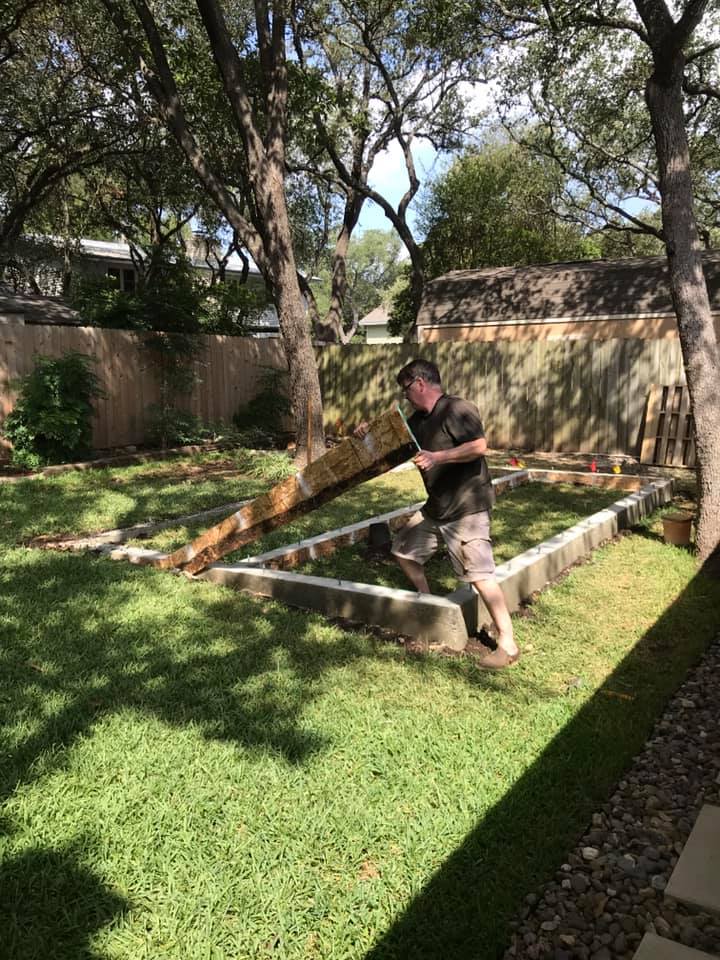
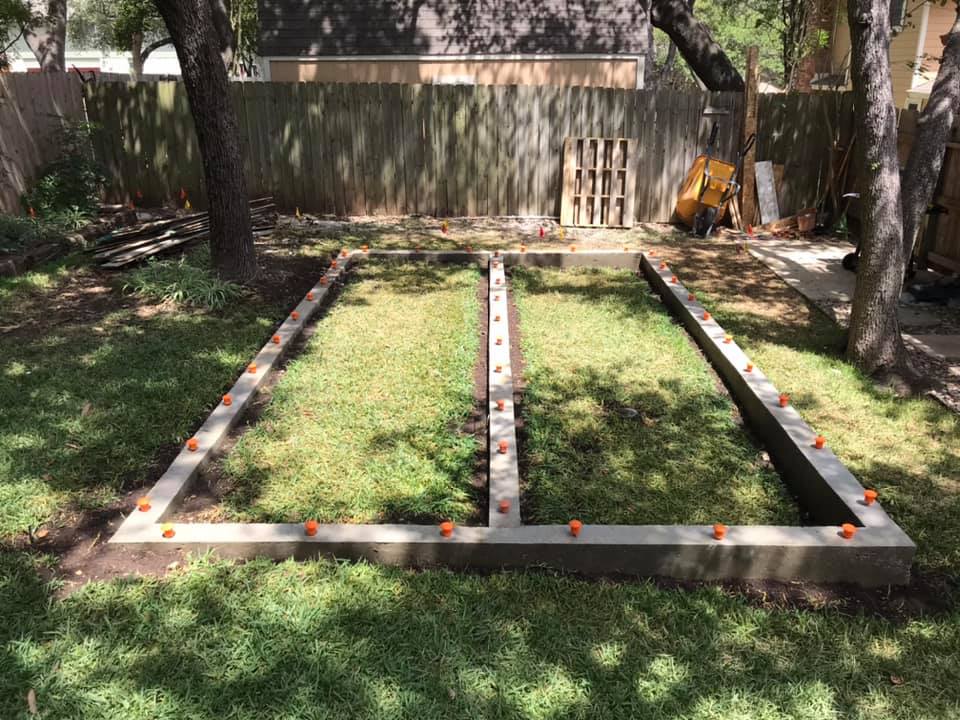
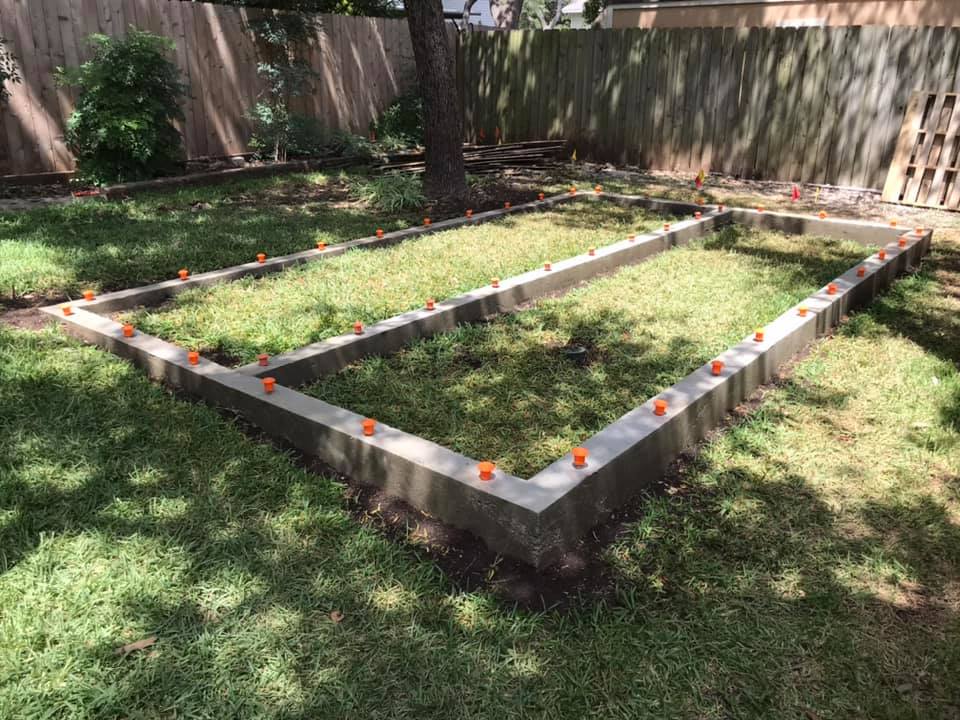
The pour is complete – now we water and wait for the concrete to cure to hardness. We need to wait for at least seven days before we do any framing on top of the foundation. We water the concrete daily to ensure a slow cure and best strength. And finally, to complete the foundation, it’s now time remove the forms. Because we’ve been watering the footers multiple times every day, the OSB swells and pulls away very easily from the cast concrete. The footers are complete! The last touch is to ensure safety by capping the j-bolts with plastic mushrooms. My inspector, our neighbor Ben, approves of my attention to safety!
The pour is complete with j-bolts installed by Joan every 4 feetA second view fo the concrete workPulling off the formMore form work comes offThe last of the form work is removedConcrete footers are read to go!Another view with some back-fill
That’s it for this post! Thanks for reading! More to come!!
So what goes into building a studio? What goes into building a studio practice? It turns out that both involve similar elements, of planning, resource management, and especially time. When you’re in the thick of it, often you forget to document the things that happen along the way, and that’s what this blog is for. Look for updates here and on our social media channels, Facebook and Instagram, for the day to day fun stuff that makes up the life of Liberty Oak Studios! Again, welcome!